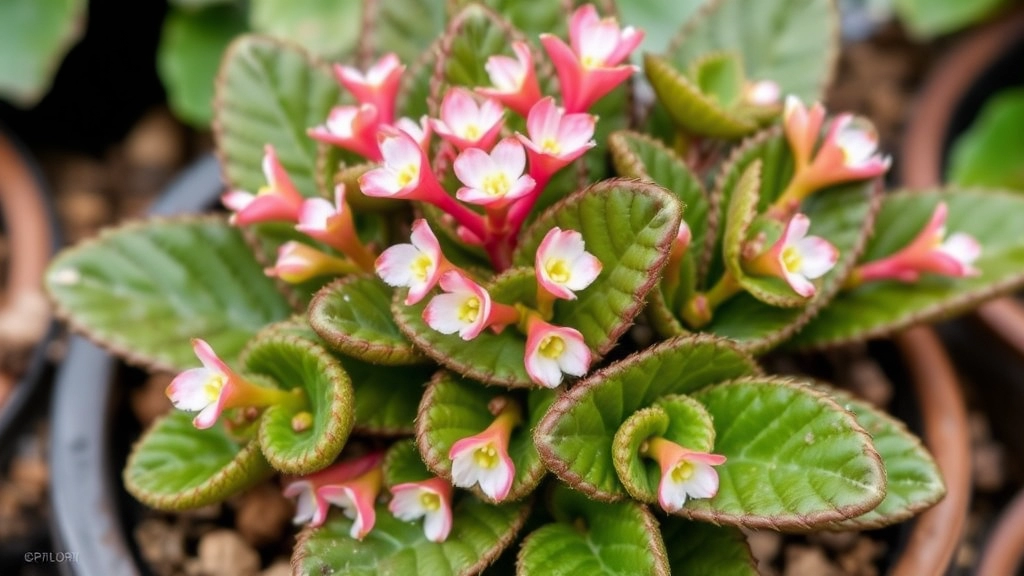
Curious about how to propagate Kalanchoe tomentosa?
You’re in the right place! In this article, we’ll dive into the fascinating world of panda plant propagation, covering everything from selecting the perfect time to troubleshooting common issues. As an experienced plant enthusiast, I’ll guide you through each step, sharing tips and tricks to ensure your propagation success.
What You’ll Learn
We’ll explore the essential tools and materials needed, proper preparation of the parent plant, and the art of taking cuttings. You’ll learn about the crucial callousing process, planting techniques, and how to provide optimal growing conditions. With my practical advice on watering, care, and monitoring, you’ll be well-equipped to nurture your new Kalanchoe tomentosa babies into thriving plants.
Selecting the Right Time for Propagation
Hey, let’s talk about when to propagate your Kalanchoe tomentosa.
Timing’s crucial, trust me.
Spring and summer are your best bets.
Why? The plant’s in growth mode, ready to rock.
Avoid winter – it’s like trying to run a marathon in your sleep.
Here’s the deal:
- Spring: Perfect for a fresh start
- Summer: Still good, but watch the heat
- Autumn: Pushing it, but possible
- Winter: Nah, let your plant chill
Remember, warmer temps = faster root growth.
But don’t go crazy in the peak of summer – too much heat can stress your cuttings.
Pro tip: Check your local climate. Some places have longer growing seasons.
Think about it like this: when would you feel most energetic to start a new project?
That’s when your Kalanchoe feels ready to grow.
Got any grow lights? You might stretch your propagation season a bit.
Bottom line: Spring’s your sweet spot for propagating Kalanchoe tomentosa.
Necessary Tools and Materials
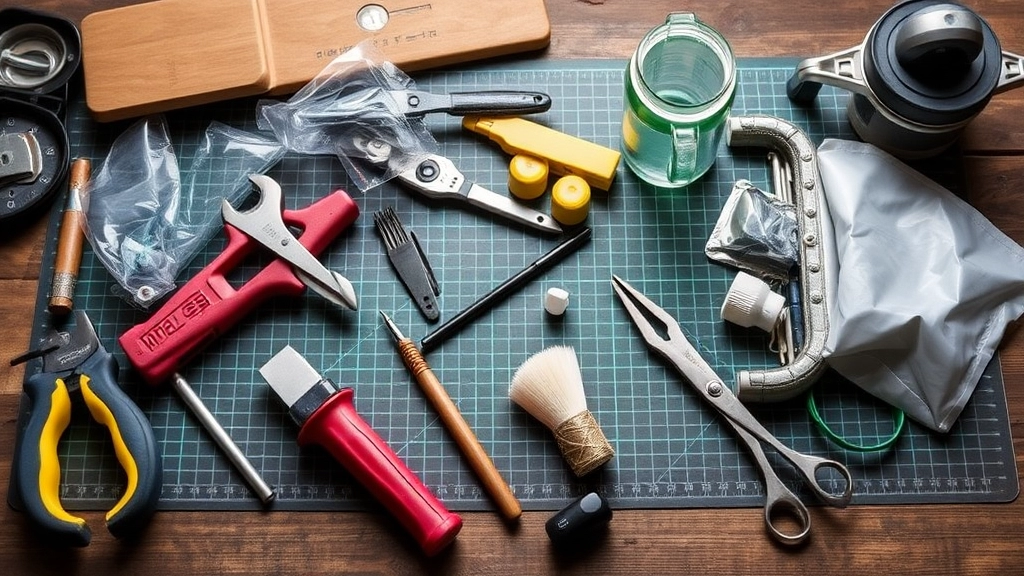
Alright, let’s dive into the nitty-gritty of what you’ll need to propagate your Kalanchoe tomentosa. Trust me, it’s not rocket science, but having the right gear can make all the difference.
Essential Tools:
- Sharp, clean scissors or pruning shears
- Small pots (about 4 inches in diameter)
- Well-draining potting mix
- Rooting hormone powder (optional, but helpful)
- Spray bottle
- Clear plastic bags or propagation dome
Now, let’s break this down a bit:
Sharp, Clean Scissors or Pruning Shears
You want these to be razor-sharp and squeaky clean. Why? Clean cuts heal faster and reduce the risk of infection. I once used dull scissors, and let me tell you, it was like trying to cut a steak with a spoon. Not fun.
Small Pots
Nothing fancy here, just make sure they have drainage holes. I’ve used everything from terracotta to plastic. As long as water can escape, you’re golden.
Well-Draining Potting Mix
This is crucial. Your Kalanchoe tomentosa hates wet feet. I mix regular potting soil with perlite or sand for extra drainage. It’s like giving your plant a cozy, breathable bed.
Rooting Hormone Powder
Optional, but it’s like giving your cuttings a little pep talk. It encourages root growth and can speed up the process. I’ve had success with and without it, so don’t stress if you can’t find any.
Spray Bottle
This is for misting your cuttings. Think of it as giving them a refreshing drink without drowning them.
Clear Plastic Bags or Propagation Dome
These create a mini greenhouse effect. It’s like tucking your cuttings in for a cozy nap while they grow roots.
Remember, propagating Kalanchoe tomentosa isn’t about having the fanciest tools. It’s about understanding what the plant needs and providing it. With these basics, you’re all set to give your panda plant babies the best start in life.
Preparing the Parent Plant
Alright, let’s dive into preparing the parent plant for Kalanchoe Tomentosa propagation.
Here’s the deal:
You’ve got to set up your parent plant for success.
First things first, pick a healthy plant. No weak sauce here.
Look for:
- Vibrant, fuzzy leaves
- Strong stems
- No signs of pests or disease
Now, here’s a pro tip:
Water your plant a day before taking cuttings.
Why? Hydrated plants = better cuttings.
But don’t go overboard. We’re not drowning it, just giving it a good drink.
Next up, cleanliness is key.
Grab some rubbing alcohol and wipe down your scissors or knife.
This stops nasties from hitching a ride to your new cuttings.
Remember:
- Clean tools = healthy cuttings
- Healthy cuttings = better chance of success
Now, take a good look at your plant.
Spot those perfect stems for cutting?
They should be:
- About 3-4 inches long
- Have a few leaves
- Look sturdy and healthy
Got your eye on a few? Great.
But hold your horses, we’re not cutting just yet.
First, make sure you’ve got everything else ready.
Trust me, it’s a game-changer when you’re prepared.
So, that’s the lowdown on prepping your parent Kalanchoe Tomentosa.
Next up, we’ll get into the nitty-gritty of taking those cuttings.
Taking Cuttings from Kalanchoe Tomentosa
Alright, let’s dive into the juicy part – snagging those cuttings from your Kalanchoe tomentosa. Trust me, it’s not rocket science, but there’s a knack to it.
First things first, you want to pick a healthy stem. Look for one that’s:
- About 3-4 inches long
- Not flowering (we want all the plant’s energy going into root growth, not blooms)
- Free from any funky spots or weird discolouration
Got your stem? Great. Now, here’s where the magic happens:
- Grab your clean, sharp scissors or pruning shears.
- Make a clean cut just below a leaf node. That’s the spot where leaves meet the stem.
- Strip off the lower leaves, leaving just a couple at the top.
Pro tip: If you’re feeling brave, you can even use a healthy leaf for propagation. Just gently twist it off the stem, making sure you get the whole leaf, including the base.
Now, I know what you’re thinking – “Is it really that simple?” Yep, it is. But here’s the kicker: timing is everything. I once tried taking cuttings in the dead of winter, and let’s just say it didn’t end well. Stick to spring or early summer for best results.
Remember, Kalanchoe tomentosa varieties are succulents, so they’re pretty forgiving. Even if you mess up a bit, chances are it’ll still grow. Just don’t go hacking away at your plant like a madman – be gentle, be patient, and before you know it, you’ll have a whole army of panda plants.
Next up, we’ll talk about letting those cuttings callous over. But for now, pat yourself on the back. You’ve just taken the first step in propagating your Kalanchoe tomentosa. How’s that for a green thumb?
Allowing Cuttings to Callous
Ever wonder why we can’t just stick Kalanchoe cuttings straight into soil? Here’s the deal:
Callousing is crucial for Kalanchoe Tomentosa cuttings. It’s like letting a wound heal before diving into a pool.
Why bother with callousing?
- Prevents rot
- Boosts rooting success
- Gives cuttings a fighting chance
How long should you wait?
Typically 2-3 days, but here’s a pro tip: look for a dry, slightly hardened end.
The callousing process:
- Place cuttings in a dry, shaded spot
- Avoid direct sunlight (it’s too harsh)
- Keep them away from moisture
What if you’re impatient?
Trust me, I’ve been there. But rushing this step is like trying to run before you can walk.
Remember: Callousing is your Kalanchoe’s best friend for propagation success.
Got questions about callousing? Drop ’em below, and let’s chat!
Planting the Cuttings
Alright, let’s get our hands dirty and plant these Kalanchoe tomentosa cuttings! Trust me, this is where the magic happens.
First things first, you’ve got to choose the right soil. I’m talking well-draining, sandy stuff that’ll keep your cuttings happy. Mix in some perlite or coarse sand if you’re feeling fancy. Why? Because these succulents hate wet feet, and we don’t want them drowning, do we?
Now, here’s a pro tip: grab a small pot for each cutting. Nothing too big â these guys like to be snug. Make sure there are drainage holes at the bottom. No holes? No problem. Just drill some yourself. It’s not rocket science, folks!
Here’s how we’re gonna do this:
- Fill your pot about 2/3 full with that killer soil mix.
- Make a small hole in the centre with a pencil or your finger.
- Gently pop your cutting in, making sure the callused end is buried about an inch deep.
- Press the soil around it, but don’t go crazy. We’re not trying to suffocate it!
Easy peasy, right? But wait, there’s more!
After planting, don’t water straight away. I know it’s tempting, but trust me on this one. Give it a day or two to settle in. It’s like when you move to a new place â you need time to adjust before diving into the local pub scene, right?
Oh, and here’s a little secret: if you’ve got multiple cuttings, try planting them in different spots. Some might prefer more sun, others less. It’s like a little experiment, and you’ll learn what works best for your space.
Remember, planting Kalanchoe tomentosa cuttings isn’t rocket science. It’s all about giving them the right start. So, get those cuttings in the soil and let’s watch them grow! If you’re interested in other varieties, you might want to check out the different types of Kalanchoe tomentosa available.
Providing Optimal Growing Conditions
Alright, let’s talk about giving your Kalanchoe tomentosa the VIP treatment.
These fuzzy little succulents aren’t too fussy, but they do have some preferences.
First up, light:
- They’re sun-lovers, but not sunbathers. Bright, indirect light is their jam.
- A spot near a window with filtered light? Perfect.
- Too much direct sun? You’ll see crispy, burnt leaves. Not cool.
Temperature:
- These guys are pretty chill, literally.
- They’re happy between 60-75°F (15-24°C).
- Can handle a bit cooler at night, but don’t let ’em freeze.
Humidity:
- Kalanchoe tomentosa isn’t big on humidity.
- Dry air? No problem. They’re desert plants, after all.
- Just keep ’em away from your bathroom jungle.
Soil:
- Well-draining is the name of the game.
- Mix regular potting soil with some perlite or sand.
- Think desert, not swamp.
Remember, these plants are survivors. They’ve adapted to tough conditions.
But give ’em these optimal growing conditions, and they’ll thrive, not just survive.
It’s all about mimicking their natural habitat. Do that, and you’re golden.
Watering and Care Instructions
Alright, let’s chat about keeping your Kalanchoe tomentosa happy and thriving. Trust me, I’ve been there – staring at my panda plant, wondering if I’m doing this whole plant parent thing right. But here’s the deal: it’s not rocket science, and I’m gonna break it down for you.
First things first: watering. These fuzzy little succulents are drama queens when it comes to moisture. They’re like that friend who can’t handle too much attention but gets grumpy when ignored. Here’s how to strike the balance:
- Let the soil dry out completely between waterings. Seriously, stick your finger in there – if it’s still damp, hold off.
- When you do water, give it a good soak. None of that light sprinkle nonsense.
- In winter, cut back on watering. Your panda plant’s basically hibernating, so it needs less H2O.
Now, let’s talk light. These guys are sun worshippers, but they’re not invincible:
- Aim for bright, indirect light. A sunny windowsill with a sheer curtain? Perfect.
- If you’re putting them outside, ease them into it. Sunburn is real for plants too, folks.
Feeding time? Keep it simple:
- Use a balanced, water-soluble fertiliser once a month during growing season.
- Skip the fertiliser in winter. Your plant’s on a diet then.
Here’s a pro tip: keep an eye on those fuzzy leaves. They’ll tell you if something’s up:
- Yellow leaves? You might be overwatering.
- Crispy edges? Could be sunburn or underwatering.
- Stretching towards the light? Your plant’s saying it needs more sun.
Remember, Kalanchoe tomentosa is a tough cookie. It can handle a bit of neglect, but show it some love and it’ll reward you with those adorable, furry leaves. Just don’t go overboard – these plants prefer a hands-off approach.
Bottom line: water sparingly, give it plenty of light, and don’t stress too much. Your panda plant will let you know what it needs. Now go forth and propagate with confidence!
Monitoring for Growth and Health
Keeping an eye on your Kalanchoe tomentosa cuttings is crucial for success.
Here’s what I do to make sure they’re thriving:
Regular Check-ups
I give my cuttings a once-over every few days.
Look for:
- New growth
- Colour changes
- Any signs of pests or disease
Root Development
After a few weeks, I gently tug on the cuttings.
If there’s resistance, roots are forming. Yay!
Leaf Growth
New leaves are a great sign.
They should be fuzzy and plump, just like the parent plant.
Troubleshooting
If something looks off, I don’t panic.
Common issues:
- Yellowing leaves (often overwatering)
- Shrivelled leaves (usually underwatering)
- Slow growth (might need more light)
Patience is Key
Kalanchoe tomentosa isn’t the fastest grower.
It might take a few months to see significant progress.
Don’t give up!
Remember, monitoring your Kalanchoe tomentosa cuttings is all about staying observant and responsive.
Common Issues and Troubleshooting
Hey there, fellow plant enthusiasts! Let’s chat about some hiccups you might face when propagating your Kalanchoe tomentosa, aka the Panda Plant. Trust me, I’ve been there, and I’ve got your back.
Pesky Problems and How to Tackle Them
1. Cuttings Not Rooting
Ever felt like your cuttings are just… chilling? Not doing much? Here’s the deal:
- Make sure you’re not overwatering. These succulents hate wet feet.
- Check the temperature. Too cold? They might be sulking.
- Try a rooting hormone. It’s like a little pep talk for your cuttings.
2. Leaf Drop
If your Panda Plant’s dropping leaves faster than a tree in autumn, consider:
- Adjusting your watering routine. Too much or too little can cause drama.
- Checking for pests. Those tiny buggers can be sneaky.
- Moving your plant. It might be throwing a fit about its current spot.
3. Yellowing Leaves
Yellow leaves are your plant’s way of waving a red flag. Here’s what to look out for:
- Overwatering is often the culprit. Let that soil dry out between waterings.
- Nutrient deficiency could be at play. Maybe it’s time for a light feed?
- Too much direct sun can cause sunburn. Yep, plants get it too!
4. Slow Growth
If your Kalanchoe’s taking its sweet time, don’t panic. But do consider:
- Checking the light. These guys love bright, indirect light.
- The season. They slow down in winter, just like us.
- Pot size. If it’s too big, they focus on root growth first.
5. Pest Invasions
Spotted some uninvited guests? Here’s how to show them the door:
- Isolate the affected plant. We don’t want a pest party.
- Try neem oil or insecticidal soap. Natural and effective.
- Keep an eye out for repeat offenders. Some pests are stubborn.
Remember, propagating Kalanchoe tomentosa is more art than science. Each plant’s a bit different, so don’t be afraid to experiment and find what works for you. And hey, if you run into trouble, the plant community’s always here to help. Keep at it, and before you know it, you’ll be a Panda Plant pro!
Frequently Asked Questions about Propagating Kalanchoe Tomentosa
Q: When is the best time to propagate Kalanchoe tomentosa?
A: The ideal time for propagation is during spring and early summer. This is when the plant is in its active growth phase, which increases the chances of successful rooting.
Q: Can I propagate Kalanchoe tomentosa from a single leaf?
A: Yes, you can! While stem cuttings are more common, leaf propagation is possible. Simply gently twist off a healthy leaf, let it callous for a few days, then place it on well-draining soil.
Q: How long does it take for Kalanchoe tomentosa cuttings to root?
A: Typically, it takes about 2-3 weeks for roots to start forming. However, visible growth above the soil might take a bit longer, sometimes up to 2 months.
Q: Do I need to use rooting hormone for Kalanchoe tomentosa propagation?
A: While not absolutely necessary, rooting hormone can speed up the process and increase success rates. It’s especially helpful if you’re new to propagation or working with a tricky plant.
Q: How often should I water my Kalanchoe tomentosa cuttings?
A: Water sparingly. Allow the soil to dry out completely between waterings. Once roots have formed, you can gradually increase watering, but always err on the side of underwatering rather than overwatering.
Q: What type of soil is best for propagating Kalanchoe tomentosa?
A: Use a well-draining soil mix. A combination of regular potting soil with added perlite or coarse sand works well. The key is to ensure the soil doesn’t retain too much moisture.
Q: Can I propagate Kalanchoe tomentosa in water?
A: While it’s possible, it’s not the recommended method. Soil propagation is generally more successful for succulents like Kalanchoe tomentosa. Water propagation increases the risk of rot.
Q: How do I know if my Kalanchoe tomentosa cutting has successfully rooted?
A: You can gently tug on the cutting after a few weeks. If you feel resistance, it’s likely roots have formed. New growth at the top of the cutting is also a good sign of successful rooting.