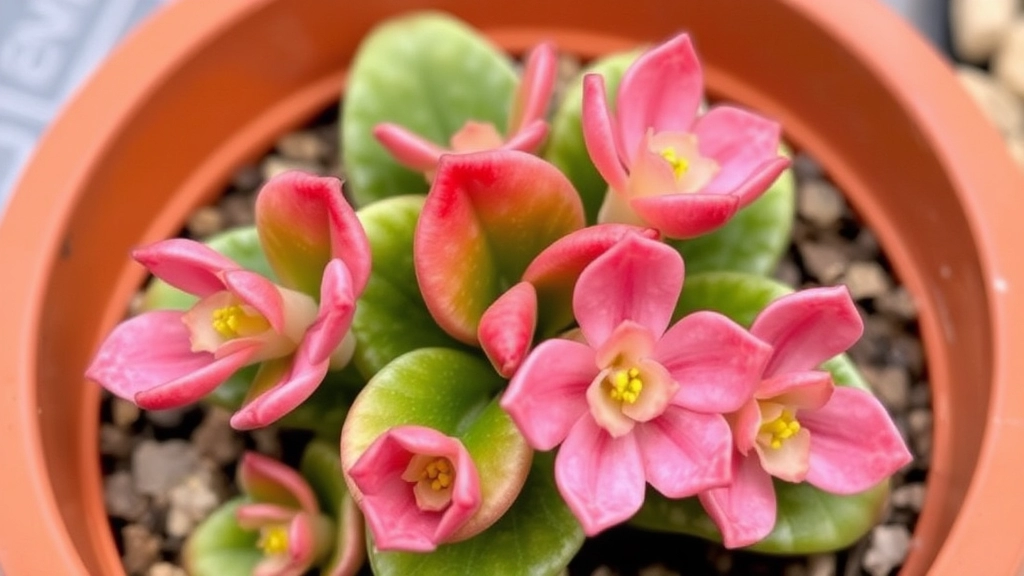
Welcome to the world of Kalanchoe tomentosa propagation!
As a passionate succulent enthusiast, I’m excited to share my hands-on experience and insider tips for multiplying these charming, fuzzy-leaved plants. Whether you’re a seasoned gardener or a curious beginner, this guide will walk you through the simple yet rewarding process of creating new Kalanchoe tomentosa plants from leaf and stem cuttings.
In this comprehensive article, we’ll explore everything from choosing the right propagation method and timing to troubleshooting common issues. You’ll learn about the essential tools, soil preparation techniques, and care tips that will set you up for success. By the end, you’ll be well-equipped to grow your own thriving Kalanchoe tomentosa family. Let’s dive in and unlock the secrets of propagating these delightful succulents!
Methods of Propagating Kalanchoe Tomentosa
Let’s talk about getting more of these fuzzy succulents, shall we?
Kalanchoe tomentosa, or panda plant, is a real champ when it comes to propagation.
Trust me, I’ve tried it all.
Here’s the deal: you’ve got two main ways to make more of these cuties.
- Leaf cuttings
- Stem cuttings
Leaf cuttings are my go-to. Why? They’re dead simple.
Just pluck a healthy leaf, let it callous, and boom – new plant.
Stem cuttings? A bit more involved, but they grow faster.
You’ll need a clean cut from the mother plant.
Both methods are pretty foolproof, even for newbies.
I’ve had mates with zero green thumb pull it off.
The key? Patience. These suckers take their sweet time.
But when it works, it’s like magic. One plant becomes many.
It’s addictive, I’m telling you.
So, which method should you choose?
Honestly, why not try both?
That’s what I did when I started. Doubled my chances of success.
Remember, Kalanchoe tomentosa is forgiving. It wants to grow.
Your job? Just give it a chance.
Best Time to Propagate Kalanchoe Tomentosa
Let’s talk about when to get your hands dirty with Kalanchoe tomentosa propagation. Timing’s crucial, folks. Get it right, and you’re setting yourself up for success.
Spring: The Sweet Spot
Spring’s your golden ticket. Why? Simple:
- Longer daylight hours
- Warmer temperatures
- Plant’s natural growth phase
It’s like the universe is giving you a thumbs up to start propagating.
Summer: Proceed with Caution
Summer can work, but watch out:
- Intense heat can stress cuttings
- Higher risk of sunburn
- More frequent watering needed
If you’re up for the challenge, go for it. Just be ready to give your cuttings extra TLC.
Autumn and Winter: Not Ideal, But Possible
Look, I’m not gonna lie â these seasons aren’t great for propagation. But if you’re itching to try:
- Use grow lights to compensate for shorter days
- Keep cuttings warm (around 70°F/21°C)
- Be patient â growth will be slower
Remember, Kalanchoe tomentosa is a succulent. It’s tough, but it’s not invincible. Treat it right, and it’ll reward you with beautiful, fuzzy leaves.
Pro Tip: Always check your plant’s health before propagating. A stressed plant won’t give you healthy cuttings, no matter the season.
Bottom line: Spring’s your best bet for propagating Kalanchoe tomentosa. But with the right care and a bit of luck, you can make it work year-round. Just remember, timing isn’t everything â it’s how you nurture those cuttings that really counts. If you’re interested in other Kalanchoe varieties, check out the Kalanchoe blossfeldiana succulent or learn about the medicinal uses of Kalanchoe pinnata.
Tools and Materials Needed for Propagation
Alright, let’s talk about what you’ll need to propagate your Kalanchoe tomentosa.
Trust me, it’s not rocket science, but having the right gear makes all the difference.
Here’s what you’ll want to grab:
- Sharp, clean scissors or pruning shears
- A small pot or container with drainage holes
- Well-draining potting mix (cactus soil works great)
- Rooting hormone powder (optional, but helpful)
- A spray bottle for misting
- Clear plastic bag or propagator lid
Now, let’s break it down a bit.
Your scissors or shears need to be sharp and clean.
Why?
Clean cuts help prevent infection and sharp tools make nice, clean cuts.
For your pot, anything with good drainage will do.
I’ve even used old yogurt containers with holes poked in the bottom.
The soil’s important – your Kalanchoe tomentosa likes it well-draining.
Rooting hormone isn’t a must, but it can give your cuttings a boost.
A spray bottle’s handy for keeping things moist without overdoing it.
And that plastic bag or lid?
It’ll create a mini greenhouse effect, which your cuttings will love.
Remember, you don’t need fancy gear to propagate Kalanchoe tomentosa.
Just the basics and a bit of patience will do the trick.
Step-by-Step Guide to Leaf Cutting Propagation
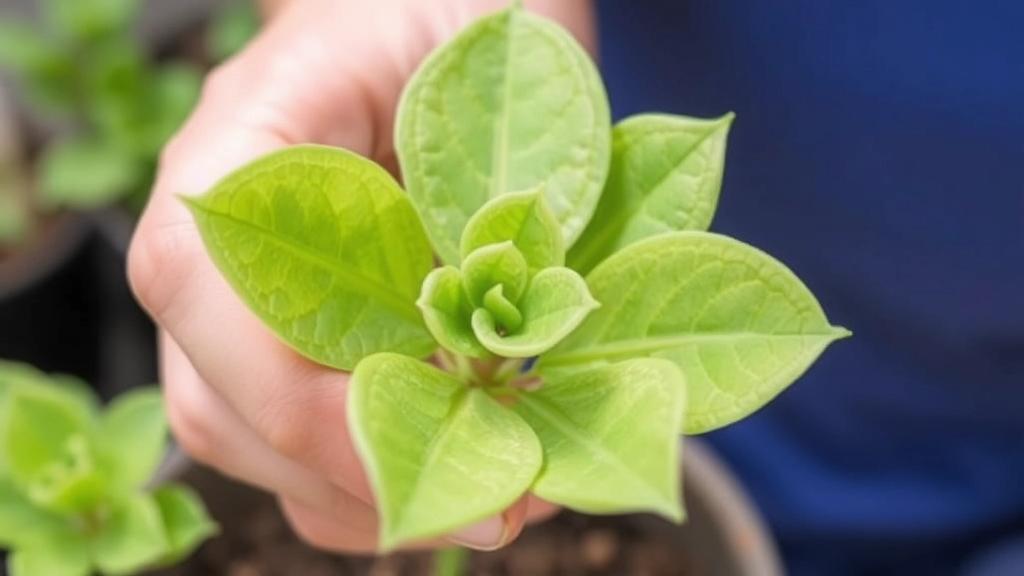
Alright, let’s dive into leaf cutting propagation for Kalanchoe tomentosa. It’s easier than you might think, and I’ll walk you through it step-by-step. Trust me, once you get the hang of it, you’ll be propagating these fuzzy succulents like a pro.
1. Choose Your Leaf
First things first, pick a healthy leaf. You want one that’s plump, free from damage, and not too old or too young. The sweet spot is a mature leaf that’s not showing signs of aging.
2. Clean Cut
Grab a sharp, clean knife or scissors. We’re going for a clean cut here, not a tear. Snip the leaf off close to the stem, making sure you get the whole leaf, including the base where it attaches to the plant.
3. Let It Callous
Here’s a crucial step many folks miss: let that cut end dry out and form a callous. This usually takes a couple of days. It’s like letting a small wound heal before you stick a plaster on it.
4. Prepare Your Pot
While you’re waiting for that callous to form, get your pot ready. Use a well-draining succulent soil mix. If you’re feeling fancy, you can make your own by mixing regular potting soil with sand and perlite.
5. Plant That Leaf
Once your leaf has calloused, it’s planting time. Stick the cut end about an inch into the soil. You can use a pencil to make a small hole if that helps.
6. Water Wisely
Give it a light sprinkle of water. We’re talking just enough to moisten the soil, not soak it. Kalanchoe tomentosa doesn’t like wet feet.
7. Find the Right Spot
Place your pot in a bright spot, but out of direct sunlight. These guys like it warm, but not scorching.
8. Play the Waiting Game
Now comes the hard part – waiting. It can take a few weeks to see any action. You might spot tiny roots or even a small plantlet forming at the base of the leaf.
9. Maintain Moisture
Keep the soil lightly moist during this time. A spray bottle can be your best friend here.
10. Celebrate New Growth
When you see a new plantlet, give yourself a pat on the back. You’ve successfully propagated a Kalanchoe tomentosa!
Remember, patience is key when propagating Kalanchoe tomentosa through leaf cuttings. It’s not an overnight process, but the results are worth the wait. And hey, if it doesn’t work out the first time, don’t sweat it. Even the pros have leaves that don’t take sometimes. Just grab another leaf and try again. Before you know it, you’ll have a whole family of fuzzy Kalanchoe plants!
Step-by-Step Guide to Stem Cutting Propagation
Alright, let’s dive into stem cutting propagation for Kalanchoe tomentosa. It’s easier than you might think!
Here’s how I do it:
- Choose your stem
Pick a healthy stem, about 4-6 inches long. Look for one that’s not flowering. - Make the cut
Use clean, sharp scissors. Cut just below a leaf node at a 45-degree angle. - Remove lower leaves
Strip off the lower leaves, leaving just a few at the top. - Let it callous
Give it a day or two to dry out and form a callous. This helps prevent rot. - Prepare the pot
Fill a small pot with well-draining cactus mix. - Plant the cutting
Make a hole and pop the stem in. Bury about an inch deep. - Water lightly
Give it a small drink, just enough to moisten the soil. - Find a bright spot
Place it somewhere with bright, indirect light. - Wait patiently
In a few weeks, you should see new growth. That’s your sign it’s rooted!
Pro tip: You can dip the cut end in rooting hormone before planting. It’s not necessary, but it can speed things up.
Remember, stem cutting propagation is all about patience. Your Kalanchoe tomentosa will grow at its own pace.
Preparing the Soil for Kalanchoe Tomentosa Cuttings
Alright, let’s talk soil for your Kalanchoe tomentosa cuttings. Trust me, getting this right is like setting the stage for a killer performance. You want your little fuzzy leaves to thrive, not just survive.
Here’s the deal:
1. Drainage is king
Your Kalanchoe tomentosa hates wet feet. Period. So, we’re going for a mix that drains faster than your bank account on payday. I’m talking:
- 2 parts potting soil
- 1 part perlite or pumice
- 1 part coarse sand
Mix it up, and you’ve got yourself a five-star hotel for your cuttings.
2. pH matters (but don’t stress)
These guys like it slightly acidic to neutral. Aim for a pH between 6.0 and 7.0. If you’re not sure, grab a cheap pH testing kit from your local garden centre. It’s worth it.
3. Container choice
Go for pots with drainage holes. No exceptions. Terracotta’s my go-to because it wicks away excess moisture. But honestly, anything with holes will do the trick.
4. Sterilise, sterilise, sterilise
I can’t stress this enough. Use fresh, sterile soil mix. Why? Because fungus gnats and other nasties love to crash the party. And trust me, you don’t want that headache.
5. Pre-moisten the mix
Before planting, dampen the soil mix. Not soaking wet, just moist enough that it clumps when you squeeze it. This preps the perfect welcome mat for your cuttings.
Pro tip: Add a thin layer of small pebbles or grit on top of your soil. It looks cool and helps prevent water from sitting on the leaves if you accidentally splash while watering.
Remember, preparing the right soil for your Kalanchoe tomentosa cuttings is like laying a solid foundation. Get this right, and you’re halfway to propagation success. It’s all about creating an environment where your cuttings can root easily and grow into healthy, fuzzy-leaved beauties. If you’re interested in other Kalanchoe varieties, check out the flowering Kalanchoe blossfeldiana for a colorful addition to your collection.
For those looking to expand their Kalanchoe knowledge, learning about the health benefits of Kalanchoe pinnata can be fascinating, even if it’s a different species from the tomentosa we’re discussing here.
Watering and Care Tips for New Kalanchoe Tomentosa Cuttings
Just got some fresh Kalanchoe Tomentosa cuttings? Let’s chat about keeping them happy.
First things first: these succulents hate wet feet.
Overwatering is the number one killer of new cuttings. Trust me, I’ve been there.
So, how do we avoid drowning our little green friends?
Here’s the deal:
- Water sparingly. Like, seriously sparingly.
- Wait until the soil is bone dry before giving them a drink.
- When you do water, make it a quick, light shower.
Think of it like this: Kalanchoe Tomentosa is the camel of the plant world.
It stores water in its leaves, so it can go ages without a top-up.
Light matters too:
- Bright, indirect light is the sweet spot.
- Too much direct sun? You’ll end up with crispy leaves.
- Not enough light? Your cutting might stretch and get leggy.
Temperature-wise, these guys are pretty chill:
- They’re happy between 60-75°F (15-24°C).
- Can handle a bit cooler at night, but don’t let them freeze.
Humidity? Not a big deal for Kalanchoe Tomentosa.
They’re desert plants, after all. Normal room humidity is fine.
Here’s a pro tip: mist the soil instead of watering when roots are just forming.
It keeps things moist without risking rot.
Remember, patience is key with new cuttings.
It might take a few weeks to see new growth, but don’t panic.
As long as your cutting isn’t shriveling up or turning black, you’re on the right track.
Bottom line: when it comes to watering and care for new Kalanchoe Tomentosa cuttings, less is more.
Keep it dry, keep it bright, and let nature do its thing.
Common Problems and Solutions in Propagation
Let’s face it, propagating Kalanchoe Tomentosa isn’t always a walk in the park. I’ve had my fair share of hiccups along the way, and I bet you’re wondering about the potential pitfalls too. So, let’s dive into some common problems you might face when propagating this fuzzy little succulent and how to tackle them head-on.
Rotting Cuttings: The Silent Killer
Ever had a cutting turn to mush? Yeah, me too. It’s usually down to overwatering or poor drainage. Here’s how to avoid it:
- Use well-draining soil – mix in some perlite or sand
- Water sparingly – let the soil dry out between waterings
- Ensure good air circulation around your cuttings
Slow Root Development: Patience is Key
Sometimes, it feels like those roots are taking forever to show up. Don’t panic! Here’s what you can do:
- Keep the temperature consistent – around 70°F (21°C) is ideal
- Use a rooting hormone to give things a boost
- Be patient – it can take 2-3 weeks for roots to develop
Leaf Drop: When Your Cuttings Go Bald
If your cuttings are losing leaves faster than a cat sheds in summer, it could be due to:
- Overwatering
- Underwatering (yep, it’s a delicate balance)
- Extreme temperatures
The fix? Adjust your watering schedule and keep your cuttings in a spot with stable temperatures.
Pest Infestations: Uninvited Guests
Mealybugs and spider mites love Kalanchoe Tomentosa as much as we do. If you spot these tiny terrors:
- Isolate affected plants immediately
- Treat with neem oil or insecticidal soap
- Keep a close eye on your other plants
Fungal Issues: The Sneaky Saboteur
High humidity and poor air circulation can lead to fungal problems. To combat this:
- Improve air circulation around your cuttings
- Reduce humidity if possible
- Apply a fungicide if needed
Remember, propagation is as much an art as it is a science. Don’t get discouraged if things don’t go perfectly the first time. Each “failure” is just a chance to learn and get better at growing these awesome fuzzy succulents.
So, keep at it, and before you know it, you’ll be a pro at propagating Kalanchoe Tomentosa. Trust me, the satisfaction of seeing those first roots or new leaves is totally worth the effort! If you’re interested in other Kalanchoe varieties, check out our guide on propagating Kalanchoe Blossfeldiana from cuttings. For those looking to expand their Kalanchoe collection, you might want to explore the various colors of Kalanchoe Blossfeldiana available.
Signs of Successful Propagation
Alright, let’s talk about how you know your Kalanchoe tomentosa propagation is working.
It’s not rocket science, but it does take a bit of patience.
Here’s what to look out for:
1. Root development
- Tiny white roots poking out? That’s a win.
- Usually takes 2-3 weeks, so don’t panic if you don’t see them right away.
2. New growth
- Fresh leaves or stems? You’re on the right track.
- This might take a bit longer, but it’s a sure sign things are going well.
3. Firm stem
- If your cutting feels sturdy, not mushy, you’re golden.
4. Colour check
- Leaves staying green? Good news.
- Yellowing or browning? Might need to adjust your care.
5. Soil moisture
- If the soil’s drying out quicker, roots are probably developing.
Remember, every plant’s different. Some might show signs faster than others.
Don’t compare your progress to others – focus on your own plant’s journey.
If you’re seeing these signs, congrats! Your Kalanchoe tomentosa propagation is likely a success.
Keep up the good work, and soon you’ll have a thriving new plant to show off.
Transplanting Propagated Kalanchoe Tomentosa
Alright, let’s talk about transplanting your newly propagated Kalanchoe tomentosa. It’s like moving into a new home – exciting but needs a bit of care.
When to Transplant?
First things first, timing is key. You’ll want to wait until your baby Kalanchoe has grown some sturdy roots. How do you know? Give it a gentle tug. If it resists, you’re good to go.
Prepping the New Pot
- Choose a pot with drainage holes – these succulents hate wet feet
- Fill it with well-draining soil mix – think cactus soil with some perlite
- Make sure the pot’s just a tad bigger than the current one
The Big Move
- Water your Kalanchoe a day before transplanting – makes it easier to remove
- Gently ease it out of its current home
- Shake off excess soil, but be careful with those roots
- Place it in the new pot at the same depth as before
- Fill in with soil, pressing gently to remove air pockets
After-Care Tips
- Hold off on watering for a few days – gives any damaged roots time to heal
- Keep it in a bright spot, but out of direct sunlight for a week
- After a week, treat it like any other Kalanchoe tomentosa
Common Hiccups
Sometimes, your Kalanchoe might look a bit sad after transplanting. Don’t panic! It’s just transplant shock. Give it time, and it’ll bounce back.
Remember, transplanting is a bit stressful for plants, just like moving house is for us. Be patient, and soon your Kalanchoe tomentosa will be thriving in its new home.
FAQs about Kalanchoe Tomentosa Propagation
1. How long does it take for Kalanchoe tomentosa cuttings to root?
Typically, it takes about 2-3 weeks for roots to develop. However, this can vary depending on environmental conditions and the health of the cutting.
2. Can I propagate Kalanchoe tomentosa in water?
While it’s possible, it’s not recommended. Kalanchoe tomentosa prefers dry conditions and is prone to rot in water. Soil propagation is more successful and mimics their natural growing conditions.
3. Do I need to use rooting hormone for successful propagation?
Rooting hormone isn’t necessary but can speed up the rooting process. Kalanchoe tomentosa generally roots well on its own, but using rooting hormone can increase your success rate.
4. How often should I water my Kalanchoe tomentosa cuttings?
Water sparingly. Allow the soil to dry out completely between waterings. Misting the soil lightly every few days is often sufficient until roots develop.
5. Can I propagate Kalanchoe tomentosa from a single leaf?
Yes, leaf propagation is possible and often successful with Kalanchoe tomentosa. Ensure you get a clean pull of the entire leaf, including the base where it attaches to the stem.
6. What’s the best time of year to propagate Kalanchoe tomentosa?
Spring and early summer are ideal, as the plant is in its active growing phase. However, with proper care, propagation can be successful year-round.
7. How do I know if my propagation attempt has failed?
Signs of failure include the cutting turning black, becoming mushy, or shriveling up despite proper care. If this happens, it’s best to start over with a new cutting.
8. Can I propagate Kalanchoe tomentosa from a flowering stem?
It’s best to avoid using flowering stems for propagation. Choose healthy, non-flowering stems for the best results.
9. How big should my Kalanchoe tomentosa cutting be?
For stem cuttings, aim for 4-6 inches in length. For leaf cuttings, any healthy, mature leaf will do.
10. How do I prevent my Kalanchoe tomentosa cuttings from rotting?
Use well-draining soil, avoid overwatering, ensure good air circulation, and let cuttings callous over before planting. These steps will significantly reduce the risk of rot.
References
-
Kalanchoe tomentosa Propagation Guide Propagating Kalanchoe Plants: How To Propagate A Kalanchoe