Welcome, plant enthusiasts!
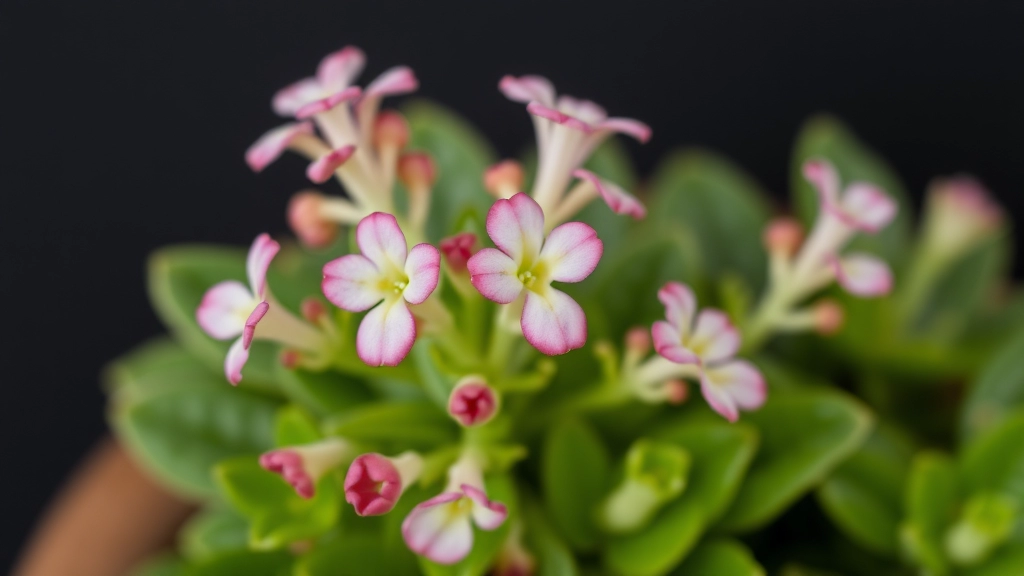
Today, we’re diving into the fascinating world of Kalanchoe blossfeldiana cuttings. As an avid gardener, I’ve propagated countless plants, but there’s something special about the vibrant, resilient Kalanchoe. In this comprehensive guide, we’ll explore everything from selecting the perfect parent plant to nurturing your new cuttings into thriving specimens.
We’ll cover the ideal timing for taking cuttings, essential tools and materials, proper preparation techniques, and the secrets to creating optimal growing conditions. Whether you’re a seasoned propagator or a curious beginner, this article will equip you with the knowledge to successfully multiply your Kalanchoe blossfeldiana collection. Let’s embark on this green-thumbed journey together!
Choosing the Right Time for Taking Cuttings
Timing is everything when it comes to plant propagation.
Trust me, I’ve learned this the hard way.
So, when’s the best time to take cuttings? Let’s break it down:
Spring and early summer are your golden windows.
Why? Plants are in full growth mode, bursting with energy.
But here’s the kicker: it depends on the plant.
Some prefer different seasons. Do your homework.
For most plants, aim for:
- Morning hours
- After a good watering the day before
- When stems are flexible but not too soft
Avoid taking cuttings:
- During flowering (the plant’s focused on blooms, not roots)
- In extreme weather (too hot or cold)
- When the plant’s stressed or unhealthy
Pro tip: Keep an eye on the moon cycle. Some swear by taking cuttings during the waxing moon.
Remember, patience is key. Don’t rush it.
Get the timing right, and you’re halfway to success. This is especially important for plants like the Kalanchoe blossfeldiana, which requires specific care. Understanding the growth patterns of Kalanchoe blossfeldiana can greatly improve your propagation success.
Selecting Healthy Parent Plants
Alright, let’s talk about picking the right parent plants for your cuttings. This is crucial, folks – you wouldn’t want to start with a dud, would you?
Why it matters
Healthy parents = healthy babies. It’s that simple. When you’re taking cuttings, you’re essentially cloning the parent plant. So if the parent’s got issues, guess what? Your new plants will inherit those problems too.
Here’s what I look for when selecting parent plants:
- Vigorous growth: The plant should be thriving, not just surviving.
- Clean leaves: No spots, discolouration, or weird patterns.
- Strong stems: Firm and flexible, not brittle or mushy.
- No pests: Check under leaves and in nooks for any unwanted guests.
Pro tip: Always go for plants that are in their active growing phase. They’re pumped full of hormones that’ll help your cuttings root faster.
But here’s the kicker – sometimes the prettiest plant isn’t the best choice. I’ve seen gardeners get starry-eyed over a stunning specimen, only to find out it’s all show and no substance.
Remember, we’re after plants that are healthy on the inside too. That means:
- Good root system (if you can check)
- No signs of disease
- Not stressed from under or overwatering
Now, I know what you’re thinking – “How do I know if a plant is stressed?” Well, it’s all about observation. Droopy leaves, yellowing, or stunted growth are all red flags. This is especially true for plants like the Kalanchoe blossfeldiana, which can show signs of stress through its leaves.
Quick story time:
I once took cuttings from a gorgeous hydrangea in my neighbour’s yard. It looked perfect – lush, full of blooms. But every single cutting failed. Turns out, the plant was battling a fungal infection we couldn’t see. Lesson learned!
So, when you’re picking your parent plants, channel your inner detective. Look beyond the surface. A healthy parent plant is your ticket to propagation success. Trust me, your future cuttings will thank you for it. And if you’re working with plants like the Flaming Katy (Kalanchoe blossfeldiana), you’ll want to be extra vigilant about selecting healthy specimens.
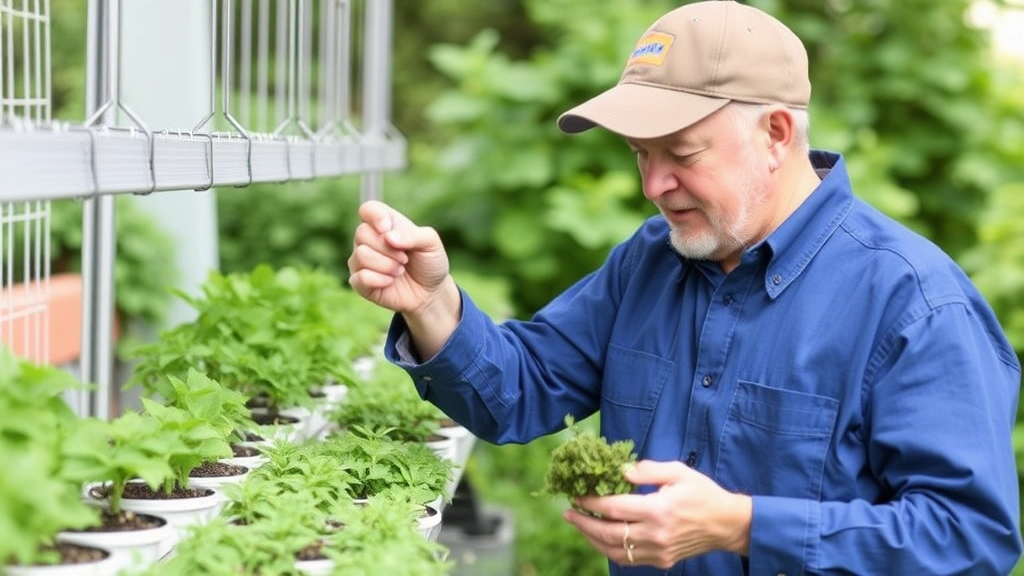
Necessary Tools and Materials
Let’s talk gear, folks. What do you need to get this plant party started?
First up, you’ll want some sharp, clean pruning shears or scissors.
Trust me, dull blades are a no-go. They’ll just mangle your cuttings.
Next, grab some small pots or containers. Nothing fancy, just make sure they’ve got drainage holes.
Potting mix is crucial. Go for something light and well-draining.
Don’t forget rooting hormone. It’s not always necessary, but it can give your cuttings a boost.
A clear plastic bag or propagator? Handy for creating a mini greenhouse effect.
Labels and a marker. You’ll thank me later when you’re not playing “guess the plant”.
And lastly, a spray bottle for misting. Your cuttings will love you for it.
Got all that? Great! You’re all set to start snipping and propagating like a pro.
Remember, having the right tools makes all the difference. It’s like trying to bake without a whisk – sure, you could do it, but why make life harder? With these tools, you’ll be well-equipped to promote healthy growth in your Kalanchoe blossfeldiana. And who knows, you might even end up with a beautiful Kalanchoe blossfeldiana hybrid if you’re feeling adventurous!
Alright, let’s dive into preparing those cuttings. This is where the magic happens, folks!
First things first, you gotta know what you’re working with. Not all plants are created equal when it comes to cuttings. Some are drama queens, others are tough as nails. But don’t sweat it, I’ve got your back.
Here’s the lowdown on prepping your cuttings:
1. Timing is everything
– Morning’s your best bet. Plants are hydrated and happy.
– Avoid the scorching midday sun. Trust me, your cuttings will thank you.
2. Tools of the trade
– Sharp, clean scissors or pruning shears. Dull blades = sad plants.
– Disinfect those bad boys. We’re not running a bacteria party here.
3. The cut
– Go for healthy, non-flowering stems. About 4-6 inches long.
– Make a clean cut just below a leaf node. That’s where the roots’ll sprout.
4. Leaf it out
– Strip off the lower leaves. They’ll just rot in the soil anyway.
– Keep a few leaves at the top. Your cutting needs to breathe, right?
5. Quick dip
– Got some rooting hormone? Give the cut end a little dip.
– No hormone? No worries. Some plants are overachievers and root without it.
Pro tip: If you’re working with multiple plant types, label them. Future you will be grateful.
Remember, preparing cuttings isn’t rocket science. It’s more like plant matchmaking. You’re setting the stage for new life. How cool is that?
So, grab those tools and let’s get snipping. Your plant babies are waiting to meet you! If you’re working with a Kalanchoe blossfeldiana succulent, you’ll find it’s quite easy to propagate. Just make sure you’re aware of the Kalanchoe blossfeldiana growth patterns to ensure successful propagation.
Rooting Hormone Application
Let’s talk about rooting hormone – it’s like a secret weapon for plant propagation.
Ever wondered why some cuttings thrive while others flop? Rooting hormone’s often the game-changer.
Here’s the deal:
- It’s not always necessary, but it can seriously boost your success rate.
- You’ve got options: powder, gel, or liquid. I prefer gel – less messy, easier to control.
- Don’t go overboard. A light dip or dusting is all you need.
- Always use a clean container. Cross-contamination’s a real buzzkill.
- Got sensitive skin? Wear gloves. Better safe than sorry, right?
Pro tip: Natural alternatives exist. Honey or cinnamon can work wonders too.
Remember, rooting hormone’s not magic. It’s just one piece of the puzzle.
Combine it with the right cutting technique, and you’re golden. This is especially important when propagating plants like the Kalanchoe blossfeldiana succulent, which can be a bit tricky to root.
Questions about rooting hormone application? Fire away in the comments! And if you’re interested in learning more about specific plants, check out our guide on Kalanchoe blossfeldiana growth for some helpful tips.
Planting the Cuttings
Alright, let’s get our hands dirty and plant these cuttings! This is where the rubber meets the road, folks. I’ve seen too many people mess up at this stage, and trust me, it’s not pretty.
First things first, you’ve got to prep your pots or trays. I’m talking about filling them with a well-draining potting mix. None of that heavy garden soil nonsense – your cuttings need to breathe, not drown.
Here’s the drill:
- Make a hole in the soil with a pencil or stick
- Gently pop your cutting in (don’t force it!)
- Firm the soil around it (but don’t squash it to death)
- Give it a light water
Now, here’s a pro tip that’s saved my bacon more times than I can count: if you’re planting multiple cuttings, space them out. Crowding is for nightclubs, not plant pots. Give each cutting room to grow, about 2-3 inches apart.
But wait, there’s more! Ever heard of a humidity dome? It’s like a mini greenhouse for your cuttings. Slap one of these bad boys on top of your tray, and you’ve just cranked up the success rate. Why? Because it keeps the moisture in and stops your cuttings from drying out faster than a puddle in the Sahara.
Look, I get it. You might be thinking, “Alex, this sounds like a lot of work.” But trust me, it’s worth it. I’ve seen people try to cut corners here, and let me tell you, it ain’t pretty. You put in the effort now, you’ll be rewarded with healthy, thriving plants later.
Remember, planting cuttings isn’t rocket science, but it does require a bit of care and attention. Get this step right, and you’re well on your way to propagation success. If you’re working with Kalanchoe blossfeldiana, also known as the Flaming Katy, you’ll find it’s a particularly rewarding succulent to propagate. Now, let’s move on to creating the perfect growing conditions for these little green babies.
Ideal Growing Conditions
Let’s talk about creating the perfect home for your cuttings.
It’s all about mimicking nature, but with a twist.
You want to give these little guys the best shot at life, right?
Here’s the deal:
Temperature: Keep it cozy
- Aim for 18-24°C (64-75°F)
- Consistent warmth is key
Light: Bright but not harsh
- Indirect sunlight is your friend
- Too much direct sun can fry them
Humidity: Think tropical
- 60-80% humidity is the sweet spot
- Use a humidity tray or mist regularly
Air circulation: Keep it moving
- Gentle airflow prevents mould
- But avoid cold drafts
Soil: Well-draining is crucial
- Mix perlite or sand into potting soil
- Soggy roots are a no-go
Remember, different plants have different needs.
Some like it hot, others prefer a cool breeze.
I’ve seen cuttings thrive in unexpected conditions.
Once, I stuck a cutting in a jar on my windowsill and forgot about it.
A month later, it had roots for days!
The takeaway? Don’t stress too much.
Plants are tougher than we give them credit for.
But give them these ideal conditions, and they’ll thank you with explosive growth. Just like the Flaming Katy Kalanchoe blossfeldiana, your cuttings will thrive with the right care.
Watering and Maintenance
Alright, let’s talk about watering and maintenance for your plant cuttings. This is where the real magic happens, folks!
Watering: The Goldilocks Zone
You know how Goldilocks wanted everything just right? That’s your cuttings. Too much water, they drown. Too little, they shrivel up. Here’s how to nail it:
– Moist, not soggy: Think of a wrung-out sponge. That’s your soil goal.
– Check daily: Stick your finger in the soil. If it’s dry an inch down, it’s drink time.
– Bottom-watering trick: Set the pot in a shallow tray of water for 15 minutes. The roots will thank you.
Maintenance: Keep ‘Em Happy
Maintaining your cuttings isn’t rocket science, but it does need some TLC. Here’s the lowdown:
1. Light love: Most cuttings dig bright, indirect light. Direct sun? That’s a sunburn waiting to happen.
2. Temperature matters: Room temp is usually spot on. Avoid drafts or sudden temp changes.
3. Humidity heroes: Mist the leaves or use a pebble tray if your place is dry as a bone.
4. Pinch to win: Nip off the growing tips once roots form. It’ll encourage bushier growth.
5. Feed with care: Hold off on fertiliser until you see new growth. Then, go easy â half-strength is plenty.
Troubleshooting: When Things Go Sideways
– Yellowing leaves? Might be overwatering. Ease up, tiger.
– Wilting despite water? Check for root rot. Time for surgery if needed.
– No new growth? Patience, grasshopper. Some plants are slow starters.
Remember, every plant’s different. What works for one might not for another. It’s all about watching, learning, and adjusting. Trust me, once you get the hang of it, you’ll be propagating like a pro in no time! If you’re specifically working with Kalanchoe blossfeldiana, also known as the Flaming Katy, you’ll want to pay extra attention to its watering needs. This succulent’s growth can be quite impressive when cared for properly.
Common Issues and Troubleshooting
Hey, let’s chat about the hiccups you might face when propagating plants.
Trust me, I’ve been there, and it’s not always smooth sailing.
But don’t worry, I’ve got your back with some quick fixes.
Rotting Cuttings: The Silent Killer
Ever had a cutting turn to mush? Yeah, it’s a bummer.
Usually, it’s because of too much water or poor drainage.
Quick fix: Ease up on the watering and make sure your soil drains well.
No Roots in Sight: The Waiting Game
Sometimes, your cuttings just won’t root. Frustrating, right?
It could be the wrong season or not enough humidity.
Try this: Cover your cuttings with a clear plastic bag to boost humidity.
Leaf Drop: The Disappearing Act
Leaves falling off? Don’t panic.
It’s often just the plant’s way of conserving energy.
Keep the environment stable and be patient.
Pest Problems: The Uninvited Guests
Bugs love tender new cuttings. Annoying, I know.
A gentle spray of neem oil can work wonders.
Yellowing Leaves: The Warning Sign
Yellow leaves usually mean your cutting’s not happy.
Could be too much sun, not enough nutrients, or wonky watering.
Adjust one thing at a time and see what works.
Remember, troubleshooting is part of the game.
Don’t get discouraged if things go south.
Keep at it, learn from each attempt, and you’ll be a propagation pro in no time. If you’re dealing with etiolated Kalanchoe blossfeldiana, it might need more light. And for those interested in different varieties, check out the yellow Kalanchoe blossfeldiana for a vibrant addition to your collection.
Alright, let’s talk about transplanting those rooted cuttings. It’s a big moment, right? You’ve nurtured these little guys, and now it’s time for them to spread their roots (literally).
When to Make the Move
First things first, timing is everything. You want to wait until your cuttings have a solid root system. How do you know? Give ’em a gentle tug. If there’s resistance, you’re good to go.
– Look for new growth on top
– Check for roots coming out of drainage holes
– Aim for roots about 1-2 inches long
Prepping for the Big Day
Before you start, get your new pots ready. I like to use pots that are about 2 inches larger than the current ones. Why? It gives the roots room to grow without drowning them in soil.
– Clean pots with soap and water
– Use fresh, well-draining potting mix
– Pre-moisten the soil (not soaking, just damp)
The Transplant Process
Here’s where the magic happens:
1. Gently remove the cutting from its current home
2. Shake off excess soil (carefully, we’re not making a mess here)
3. Place in the new pot at the same depth it was before
4. Fill in with soil, pressing lightly to remove air pockets
5. Water thoroughly
Pro tip: If you’re dealing with delicate plants, try the “soil ball” method. Keep the original soil intact around the roots and plop the whole thing into the new pot.
After-Care
Your newly transplanted cuttings might look a bit sad at first. Don’t panic! It’s normal. They’re just adjusting to their new digs.
– Keep them out of direct sunlight for a few days
– Maintain consistent moisture (not soggy, not dry)
– Hold off on fertilizer for a couple of weeks
Common Hiccups
Sometimes things don’t go as planned. Here’s what to watch for:
– Wilting: Probably just transplant shock. Give it time.
– Yellowing leaves: Could be overwatering. Let it dry out a bit.
– No new growth: Be patient. It can take a few weeks.
Remember, transplanting rooted cuttings is a bit of an art. You’ll get better with practice. And hey, even if you lose a few along the way, that’s all part of the learning process. Keep at it, and before you know it, you’ll have a whole garden of plants you’ve grown from scratch. How cool is that?
If you’re specifically working with Kalanchoe blossfeldiana succulents, you might notice that they’re particularly resilient during the transplanting process. These plants, also known as the Flaming Katy, are quite adaptable and can bounce back quickly from the stress of being moved to a new pot.
Long-term Care for New Plants
Alright, let’s chat about keeping your new plant babies thriving long-term. It’s not rocket science, but it does take a bit of love and attention.
First things first, you’ve got to remember these little guys are still finding their feet. They’re like toddlers learning to walk – they need a bit of extra support.
Feeding Your New Plants
- Start with a weak fertiliser solution – about half the strength you’d use for mature plants
- Gradually increase the strength over a few months
- Don’t overdo it – too much food can burn those delicate roots
Pruning for Success
Pruning isn’t just about looks – it’s about helping your plant grow strong and healthy. Here’s the deal:
- Pinch out the growing tips to encourage bushiness
- Remove any dead or yellowing leaves
- Don’t go overboard – your plant needs those leaves for energy
Repotting: When and How
You’ll know it’s time to repot when:
- Roots are poking out the bottom of the pot
- The plant looks too big for its current home
- Growth has slowed down
When you do repot, go up just one pot size. Too big a jump can lead to waterlogging.
Dealing with Pests and Diseases
Keep an eye out for unwanted visitors. Spotted something? Act fast:
- Isolate the affected plant
- Identify the problem
- Treat with the appropriate method (organic if possible)
Remember, prevention is better than cure. Regular checks can catch issues early.
Seasonal Care
Your plants’ needs change with the seasons. In winter:
- Water less frequently
- Hold off on fertilising
- Move plants away from cold windows
In summer:
- Water more often
- Provide shade from intense sun
- Increase humidity for tropical plants
Long-term care for new plants isn’t complicated, but it does require consistency. Stick with it, and you’ll have a thriving green family in no time. Trust me, there’s nothing quite like watching a plant you’ve grown from a cutting flourish into a stunning specimen. It’s all about that long game, folks! If you’re looking for specific care tips, you might want to check out our guide on Kalanchoe blossfeldiana growth. And for those dealing with leggy plants, our article on etiolated Kalanchoe blossfeldiana could be helpful.
Frequently Asked Questions (FAQs)
Q: What is the best time to take Kalanchoe blossfeldiana cuttings?
A: The ideal time to take Kalanchoe blossfeldiana cuttings is during spring or early summer when the plant is in its active growth phase. This gives the cuttings the best chance to root and establish themselves.
Q: How long does it take for Kalanchoe blossfeldiana cuttings to root?
A: Typically, Kalanchoe blossfeldiana cuttings take about 2-3 weeks to develop roots. However, this can vary depending on environmental conditions and the health of the cutting.
Q: Do I need to use rooting hormone for Kalanchoe blossfeldiana cuttings?
A: While not strictly necessary, using rooting hormone can increase the success rate and speed up the rooting process for Kalanchoe blossfeldiana cuttings. It’s especially helpful if you’re new to propagation.
Q: How often should I water my Kalanchoe blossfeldiana cuttings?
A: Water your Kalanchoe blossfeldiana cuttings when the top inch of soil feels dry. Overwatering can lead to rot, so it’s better to err on the side of underwatering. Misting the leaves can help maintain humidity without waterlogging the soil.
Q: Can I propagate Kalanchoe blossfeldiana from leaves?
A: Yes, you can propagate Kalanchoe blossfeldiana from leaf cuttings. However, stem cuttings generally have a higher success rate and grow into fuller plants more quickly.
Q: How do I know if my Kalanchoe blossfeldiana cutting is ready for transplanting?
A: Your Kalanchoe blossfeldiana cutting is ready for transplanting when it has developed a strong root system (usually about 1-2 inches long) and shows signs of new growth on top. This typically occurs 4-6 weeks after taking the cutting.
Q: What kind of soil is best for Kalanchoe blossfeldiana cuttings?
A: Kalanchoe blossfeldiana cuttings thrive in well-draining soil. A mix of regular potting soil with added perlite or sand works well. This ensures good drainage while retaining enough moisture for the developing roots.
Q: How can I encourage bushier growth in my Kalanchoe blossfeldiana?
A: To encourage bushier growth, pinch off the growing tips of your Kalanchoe blossfeldiana once it has established roots and shows new growth. This promotes branching and results in a fuller plant.