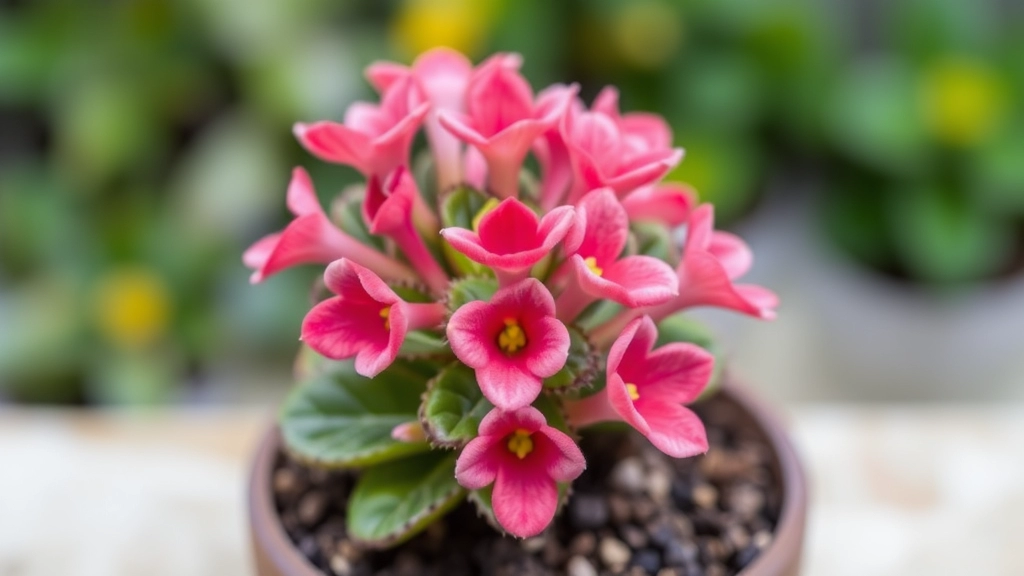
Unlock the Secrets of Florist Kalanchoe Propagation
Are you ready to unlock the secrets of florist kalanchoe propagation? As an experienced plant enthusiast, I’m thrilled to share my tried-and-true methods for multiplying these vibrant beauties. In this comprehensive guide, we’ll dive into everything from selecting the perfect parent plant to nurturing your new cuttings into thriving specimens. Whether you’re a seasoned gardener or a curious beginner, you’ll find valuable insights to expand your kalanchoe collection with confidence.
We’ll explore various propagation techniques, including leaf and stem cuttings, and reveal the essential tools and materials you’ll need for success. I’ll walk you through each step of the process, sharing expert tips on soil preparation, watering techniques, and light requirements. Plus, we’ll troubleshoot common issues and discuss how to care for your young plants to ensure they flourish. Get ready to transform your home into a kalanchoe paradise – let’s embark on this exciting propagation journey together!
Selecting the Right Kalanchoe for Propagation
Alright, let’s dive into picking the perfect Kalanchoe for propagation. Trust me, this isn’t rocket science, but it’s crucial if you want to nail it.
First things first: health is wealth
When I’m on the hunt for a Kalanchoe to propagate, I’m like a detective looking for clues. Here’s what I’m after:
- Vibrant leaves: No yellow, brown, or spotty nonsense
- Sturdy stems: We want strong, not floppy
- Pest-free: If it’s got bugs, it’s a no-go
Pro tip: Always check the undersides of leaves. That’s where the sneaky pests like to hang out.
Size matters (but not how you think)
Here’s a curveball for you – bigger isn’t always better. I’ve had more success with medium-sized plants. They’re:
- Easier to handle
- Often healthier
- More likely to have perfect propagation material
Variety is the spice of life
Kalanchoes come in all shapes and sizes. Some popular choices:
- Kalanchoe blossfeldiana (Flaming Katy)
- Kalanchoe tomentosa (Panda Plant)
- Kalanchoe daigremontiana (Mother of Thousands)
Each has its quirks, but they’re all great for propagation. Just pick one that tickles your fancy.
The age-old question: mature or young?
I’ve propagated both young and mature Kalanchoes, and here’s the tea:
- Young plants: Faster growth, but can be a bit fragile
- Mature plants: Slower, but often more reliable
My two cents? Go for something in the middle. Not too young, not too old – just right.
Remember, selecting the right Kalanchoe for propagation is your first step towards success. Choose wisely, and you’re already halfway there. Now, let’s roll up our sleeves and get propagating!
Understanding the Best Time for Propagation

Timing is everything when it comes to Kalanchoe propagation.
Trust me, I’ve learned this the hard way.
So, when’s the sweet spot for getting those cuttings going?
Spring and early summer are your best bets.
Why? The plant’s in full growth mode, ready to put out new roots and leaves.
But here’s the thing – you can technically propagate year-round if you’re growing indoors.
Just keep in mind, growth might be slower in winter.
Here’s a quick breakdown:
- Spring: Ideal time, plant’s energy is high
- Summer: Still good, but watch out for heat stress
- Autumn: Possible, but growth slows down
- Winter: Trickier, but doable with proper care
Pro tip: Always propagate from healthy, pest-free plants.
Avoid propagating when the plant’s flowering – it’s putting all its energy into those blooms.
Remember, patience is key. Don’t rush the process.
Give your cuttings time to root and establish themselves.
In my experience, waiting for the right moment makes all the difference.
So, keep an eye on your Kalanchoe tomentosa and strike when the time is right.
Your future plants will thank you for it, especially if you’re working with varieties like the Kalanchoe blossfeldiana.
Essential Tools and Materials Needed
Alright, let’s talk about the gear you’ll need to propagate your Kalanchoe like a pro. Trust me, having the right tools makes all the difference – it’s like trying to cook without a pan, you just can’t do it!
Here’s what you’ll want to grab:
- Sharp, clean scissors or pruning shears
- Small pots or containers with drainage holes
- Well-draining potting mix (more on this later)
- Rooting hormone powder (optional, but helpful)
- Spray bottle for misting
- Clear plastic bags or propagation dome
- Labels and a marker (trust me, you’ll thank me later)
Now, let’s break it down a bit:
Sharp Tools = Happy Plants
First things first, you need something to make clean cuts. Dull scissors will just mangle your Kalanchoe, and that’s no good. I like using pruning shears because they give me a nice, crisp cut every time. Whatever you use, make sure it’s clean – we don’t want to spread any nasties to our new plants.
Pots and Soil: The Foundation
Your baby Kalanchoes need a home, right? Small pots or containers with drainage holes are perfect. Don’t go too big – these little guys don’t need a mansion yet. As for soil, a well-draining potting mix is key. Kalanchoes hate wet feet, so we need to make sure water doesn’t hang around too long.
Rooting Hormone: The Secret Weapon
This stuff is like steroids for your cuttings (but legal, don’t worry). It’s not absolutely necessary, but it can give your propagation efforts a real boost. Just dip the cut end in before planting, and you’re golden.
Misting and Humidity: Keeping It Cozy
A spray bottle is great for keeping your cuttings moist without drowning them. And those clear plastic bags or a propagation dome? They’re like a little greenhouse, keeping the humidity high and your cuttings happy.
Labels: Don’t Trust Your Memory
Trust me on this one – label your cuttings. You might think you’ll remember which cutting is which, but two weeks later, you’ll be scratching your head. A simple stick-on label and a marker will save you a lot of confusion.
With these tools in your arsenal, you’re all set to start propagating Kalanchoes like a champ. Remember, having the right gear is half the battle when it comes to successful propagation. So, grab your tools, and let’s get growing!
Step-by-Step Guide to Leaf Cuttings
Alright, let’s dive into leaf cuttings for Kalanchoe. It’s easier than you might think!
Here’s how I do it:
1. Choose Your Leaves
Pick healthy, mature leaves. They should be plump and vibrant.
Avoid any that look sad or diseased.
2. Clean Your Tools
Grab some sharp scissors or a clean knife.
Sterilize them with rubbing alcohol. Trust me, it matters.
3. Make the Cut
Gently twist the leaf off the stem.
Or, cut it close to the stem if twisting doesn’t work.
4. Let It Callous
This is crucial. Let the cut end dry for a day or two.
It forms a callous, which helps prevent rot.
5. Prepare Your Pot
Fill a small pot with well-draining soil mix for Kalanchoe blossfeldiana.
Make sure it has drainage holes. Kalanchoes hate wet feet.
6. Plant the Leaf
Stick the calloused end about an inch into the soil.
Don’t bury the whole leaf. It needs to breathe.
7. Water Sparingly
Mist the soil lightly. Don’t soak it.
Too much water is a leaf cutting’s worst enemy.
8. Provide Warmth and Light
Place the pot in a warm spot with bright, indirect light.
No direct sun yet. It’s too harsh for the baby leaf.
9. Wait Patiently
This is the hard part. It might take weeks to see growth.
Keep the soil slightly moist, but not wet.
10. Celebrate New Growth
When you see tiny leaves or roots, you’ve done it!
Now you can care for it like a regular Kalanchoe tomentosa.
Remember, leaf cuttings are a game of patience. But when it works, it’s so rewarding.
Give it a shot. You might surprise yourself with your green thumb!
Propagating Kalanchoe from Stem Cuttings
Ever wondered how to multiply your Kalanchoe collection without breaking the bank? Stem cuttings are your secret weapon. Let’s dive into this game-changing technique that’ll have you swimming in Kalanchoes faster than you can say “green thumb.”
Why Stem Cuttings Rock
Look, I’ve tried every propagation method under the sun, and stem cuttings are the real MVP for Kalanchoes. They’re quick, they’re easy, and they work like a charm. Plus, you get a fully-grown plant in no time. What’s not to love?
Getting Started: The Basics
First things first, you need a healthy parent plant. No point trying to propagate from a sickly Kalanchoe – that’s like trying to run a marathon with a sprained ankle. Not gonna end well.
Here’s what you’ll need:
- Sharp, clean scissors or pruning shears
- A healthy Kalanchoe plant
- Small pots
- Well-draining potting mix
- Rooting hormone (optional, but it’s like steroids for your cuttings)
Step-by-Step: Let’s Do This
- Choose Your Fighter
Pick a healthy stem with at least two sets of leaves. Ideally, go for one that’s about 3-4 inches long. Remember, bigger isn’t always better – we’re not compensating for anything here. - Make the Cut
Cut just below a leaf node at a 45-degree angle. Why? It increases the surface area for root development. Plus, it looks cool. - Strip It Down
Remove the lower leaves, leaving only the top two sets. This part’s going in the soil, and we don’t want any rotting leaves ruining the party. - Optional Power-Up: Rooting Hormone
Dip the cut end in rooting hormone if you’re using it. It’s like giving your cutting a Red Bull before the race. - Plant That Bad Boy
Stick the cutting about an inch deep into your well-draining potting mix. Pat the soil gently – we’re not making sandcastles here. - Water and Wait
Give it a light watering and place it in bright, indirect light. Now comes the hard part – patience. Resist the urge to helicopter parent your cutting.
Pro Tips for Success
- Keep the soil slightly moist, but not waterlogged. Drowning your cutting won’t make it grow faster.
- If you’re feeling fancy, create a mini greenhouse effect by covering the pot with a clear plastic bag. Just remember to poke some holes for air circulation – we’re not trying to suffocate the poor thing.
- Expect roots in about 2-3 weeks. You’ll know it’s working when you see new growth at the top.
Common Pitfalls to Dodge
- Overwatering: The number one killer of Kalanchoe cuttings. When in doubt, let it dry out.
- Too much direct sun: These guys prefer bright, indirect light. Think beach umbrella, not tanning bed.
- Impatience: Rome wasn’t built in a day, and your Kalanchoe won’t root overnight. Chill out and let nature do its thing.
Wrapping It Up
Propagating Kalanchoe from stem cuttings is like printing your own money, but with plants. It’s simple, effective, and oddly satisfying. Give it a shot, and before you know it, you’ll be the Kalanchoe kingpin of your neighbourhood. Just remember, with great power comes great responsibility – and a lot of watering cans.
Alright, let’s talk about getting that soil just right for your Kalanchoe cuttings. Trust me, this part’s crucial for giving your new plants the best start. Here’s what I’ve learned from years of trial and error:
The Perfect Mix:
⢠2 parts well-draining potting soil
⢠1 part perlite or coarse sand
⢠1 part coco coir or peat moss
Why this combo? It’s all about balance, mate. You want something that holds moisture but doesn’t get soggy. Kalanchoes hate wet feet â it’s a quick road to root rot.
Pro tip: Add a handful of small pebbles at the bottom of your pot for extra drainage.
pH Matters:
Aim for slightly acidic to neutral soil (6.0-7.0 pH). Most commercial potting mixes are in this range, so no need to stress. But if you’re unsure, grab a cheap pH testing kit from your local garden centre.
Sterilise Your Soil:
I know, sounds a bit extra, but hear me out. Bake your soil mix in the oven at 180°C for about 30 minutes. This zaps any nasties that might harm your cuttings. Just let it cool before using â nobody likes a burnt plant!
Container Choice:
Go for pots with drainage holes. Terracotta’s great because it’s porous and helps prevent overwatering. But honestly, any container will do as long as water can escape.
Remember, the right soil mix is your Kalanchoe’s foundation for success. Get this part right, and you’re halfway to propagation glory. If you’re looking for a specific variety to propagate, the Kalanchoe blossfeldiana hybrid is a popular choice for its vibrant blooms and easy care.
Proper Watering Techniques for New Cuttings
Alright, let’s talk about watering your new Kalanchoe cuttings. It’s a make-or-break deal, folks. Get this right, and you’re golden. Mess it up, and you might as well kiss your plant babies goodbye.
Here’s the deal:
1. The Golden Rule: Less is More
I can’t stress this enough. When it comes to watering new Kalanchoe cuttings, you’ve gotta channel your inner minimalist. Overwatering is the number one killer of these succulents. Trust me, I’ve been there, done that, and it ain’t pretty.
2. The Finger Test
Forget fancy moisture meters. Your finger is your best friend here. Stick it about an inch into the soil. If it’s dry, give it a drink. If it’s still moist, leave it be. Simple as that.
3. Watering Schedule? Throw it Out the Window
Seriously, don’t even think about setting a rigid watering schedule. Your Kalanchoe doesn’t care what day of the week it is. It cares about how dry the soil is. Period.
4. The Drench and Drain Method
When you do water, do it right. Give it a good soak until water runs out the drainage holes. Then, let it drain completely. No sitting in water, folks. That’s a one-way ticket to root rot city.
5. Morning Glory
If you can, water in the morning. It gives the plant all day to soak up what it needs and dry out a bit before nightfall. Night-time moisture is like an open invitation for fungal problems.
6. Climate Matters
Living in a humid area? You’ll need to water less. Dry climate? You might need to water a tad more. It’s all about balance and paying attention to your plant’s needs.
7. Signs of Trouble
Keep an eye out for yellowing leaves or a droopy plant. These could be signs of overwatering. On the flip side, if leaves start to wrinkle or feel crispy, you might be underwatering.
Remember, Kalanchoes are succulents. They’re built to withstand drought, not drowning. When in doubt, err on the side of dry. Your Kalanchoe will thank you for it.
By nailing these watering techniques for your new Kalanchoe cuttings, you’re setting yourself up for propagation success. It’s all about finding that sweet spot between desert and swamp. Get it right, and you’ll be well on your way to a thriving Kalanchoe collection.
Providing Optimal Light Conditions
Light’s a game-changer for Kalanchoe propagation. Let’s break it down.
These succulents love bright, indirect light. But too much can fry ’em.
Here’s the deal:
- Place your cuttings near a window that gets plenty of light, but not direct sun.
- East or west-facing windows? Perfect.
- South-facing? Might be too intense. Use a sheer curtain to filter the light.
- North-facing? Might not cut it. Consider grow lights.
Remember, Kalanchoes are sun-lovers, but newbies need to ease into it.
Start with 4-6 hours of bright, indirect light daily.
Gradually increase exposure as they grow stronger.
Watch for signs:
- Stretching or pale leaves? Not enough light.
- Scorched or brown spots? Too much direct sun.
Pro tip: Rotate your pots regularly for even growth.
Artificial light works too. LED grow lights can be a lifesaver in low-light homes.
Bottom line: Get the light right, and you’re halfway to Kalanchoe tomentosa propagation success. If you’re looking for a unique variety to propagate, consider the Kalanchoe beharensis, known for its large, velvety leaves.
Common Mistakes to Avoid During Propagation
Let’s chat about the slip-ups that can trip you up when you’re propagating Kalanchoe. Trust me, I’ve been there, done that, and learned the hard way. So, I’m gonna share some real talk about what not to do, so you can skip the headaches and get straight to the good stuff.
Overwatering: The Plant Killer
First up, overwatering. It’s like that friend who always overstays their welcome – too much of a good thing. Kalanchoes are succulents, which means they’re tough cookies when it comes to water. But drown them, and you’re in for a world of hurt.
- Tip: Let the soil dry out between waterings. Seriously, these guys prefer a drought to a flood.
Ignoring Light Needs: The Shade Game
Next mistake? Thinking your Kalanchoe can thrive in the shadows. Nope, these sun-lovers need their vitamin D.
- Remember: Bright, indirect light is the sweet spot. Too much direct sun can scorch ’em, but too little, and they’ll get all leggy and sad.
Impatience: The Waiting Game
Look, I get it. You want results yesterday. But rushing the process is like trying to make a soufflé in a microwave – it just doesn’t work.
- Pro tip: Give your cuttings time to root. It might take weeks, so chill out and let nature do its thing.
Forgetting to Sterilize: The Germ Spread
Using dirty tools is like going into surgery with unwashed hands. Yuck, right? You’re just asking for trouble.
- Quick fix: Clean your scissors or knife with rubbing alcohol before making any cuts. It takes two seconds and saves a world of pain.
Wrong Soil Mix: The Foundation Fail
Using regular potting soil for your Kalanchoe cuttings? That’s a rookie move. These guys need drainage like fish need water.
- Get it right: Mix regular potting soil with sand or perlite. Your plants will thank you with robust growth.
Neglecting Humidity: The Dry Spell
While Kalanchoes aren’t tropical divas, they do appreciate a bit of moisture in the air, especially when they’re just starting out.
- Easy solution: Cover your cuttings with a clear plastic bag to create a mini greenhouse effect. Just remember to poke some holes for air circulation.
Inconsistent Care: The Rollercoaster Ride
Treating your propagation project like a passing fad is a surefire way to failure. These plants need consistent TLC.
- Stay on track: Set reminders if you have to. Regular check-ins and care will make all the difference.
Ignoring Signs of Trouble: The Ostrich Approach
Burying your head in the sand when you see yellowing leaves or wilting? That’s not gonna cut it.
- Be proactive: Learn to spot early signs of issues and address them pronto. A stitch in time saves nine, as they say.
By steering clear of these common blunders, you’re setting yourself up for propagation success. Remember, every plant parent makes mistakes – it’s how we learn and grow (pun intended). Keep at it, stay observant, and before you know it, you’ll have a thriving Kalanchoe family to show for your efforts.
Caring for Young Kalanchoe Plants
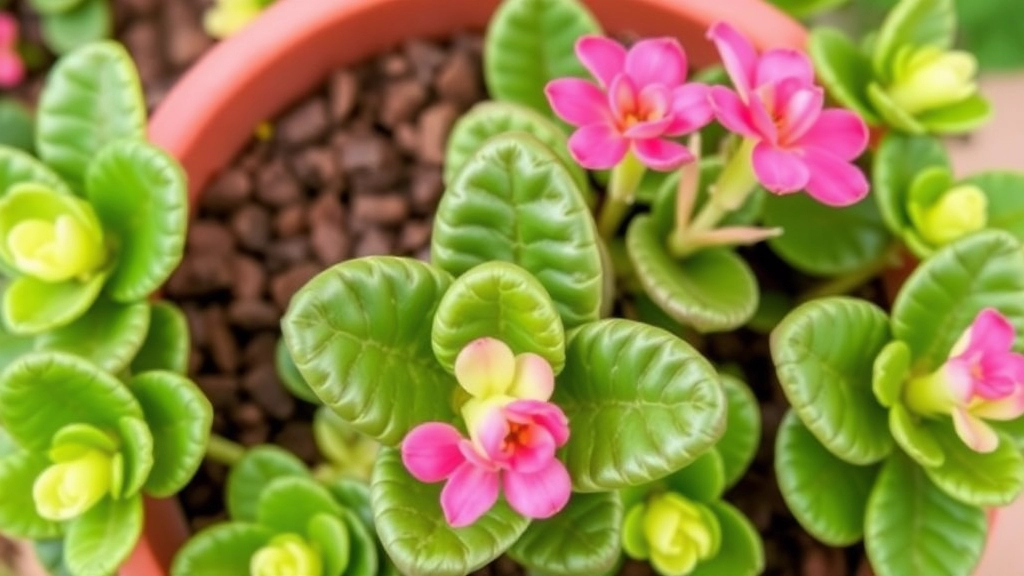
Alright, let’s talk about nurturing those baby Kalanchoes. It’s not rocket science, but it does need some TLC.
Watering
- These little guys are succulents, so they’re not big drinkers.
- Overwatering is a rookie mistake. Trust me, I’ve been there.
- Let the soil dry out between waterings. When in doubt, go for less rather than more.
Light
- Young Kalanchoes love bright, indirect sunlight.
- Too much direct sun? You’ll see scorched leaves. Not pretty.
Temperature
- Keep ’em cozy between 60-85°F (15-29°C).
- They’re not fans of cold drafts or sudden temperature changes.
Feeding
- Use a balanced, water-soluble fertilizer every 2-4 weeks during growing season.
- But go easy â less is more with these plants.
Pruning
- Pinch off the growing tips when they’re about 4-6 inches tall.
- It might seem harsh, but trust me, your Kalanchoe will thank you later.
Pest Control
- Mealybugs and spider mites love young plants.
- Keep an eye out and deal with them ASAP if you spot any.
Remember, patience is key. Young Kalanchoes take time to mature. Don’t expect flowers right away â focus on healthy growth first.
Caring for young Kalanchoe plants isn’t complicated, but it does require attention to detail and consistency. Get these basics right, and you’ll have thriving, beautiful plants in no time.
Troubleshooting Common Propagation Issues
Let’s face it, propagating Kalanchoe isn’t always a walk in the park. Even with the best intentions, things can go sideways. But don’t sweat it! I’ve been there, done that, and I’m here to help you navigate the bumps in the road.
Leaf Cuttings Not Rooting
Ever stuck a leaf in soil and… crickets? Nothing happens? Yeah, been there. Here’s the deal:
- Check the leaf: Is it healthy and plump? Shrivelled leaves are a no-go.
- Patience is key: Sometimes it takes weeks. Don’t give up too soon!
- Try this trick: Dip the cut end in rooting hormone. It’s like a energy drink for roots.
Stem Cuttings Rotting
Ugh, there’s nothing worse than watching your cuttings turn to mush. Here’s how to avoid this mess:
- Let the cut end callous over before planting. Give it a day or two.
- Easy on the water, champ! Overwatering is the number one killer.
- Make sure your potting mix drains well. No one likes wet feet, especially Kalanchoe.
Slow Growth or No Growth
If your cuttings are alive but not thriving, it’s time to play detective:
- Light check: Are they getting enough sun? Too much? Find that sweet spot.
- Nutrient game: Once roots form, a weak fertilizer can give them a boost.
- Temperature matters: If it’s too cold, growth slows down. Warm them up!
Pest Problems
Tiny invaders can wreak havoc on your propagation efforts. Here’s how to fight back:
- Inspect regularly: Catch those buggers early!
- Neem oil is your friend: It’s natural and effective against most pests.
- Quarantine new plants: Don’t let one infected plant ruin the party.
Fungal Issues
Mold and fungus can be a real pain. But don’t panic, we’ve got solutions:
- Improve air circulation: A small fan can work wonders.
- Cinnamon trick: Sprinkle some on the soil. It’s a natural fungicide!
- Let the soil dry out between waterings. Fungi love moisture.
Remember, propagation is part science, part art, and a whole lot of patience. Don’t be too hard on yourself if things don’t work out the first time. Each “failure” is just a lesson in disguise. Keep at it, and before you know it, you’ll be the Kalanchoe propagation guru in your circle!
And hey, if all else fails, there’s always the garden centre. But where’s the fun in that? Troubleshooting these common propagation issues is all part of the journey. Embrace it, learn from it, and watch your Kalanchoe family grow!
Tips for Ensuring Successful Growth and Bloom
Alright, let’s talk about making your Kalanchoe thrive.
Here’s the deal: success with these plants isn’t rocket science, but it does need a bit of know-how.
Light
First up, light is key.
These guys love bright, indirect sunlight.
Too little, and they’ll get leggy. Too much, and they’ll burn.
Find that sweet spot, and you’re golden.
Watering
Next, let’s chat about water.
Kalanchoes are succulents, so they’re not big drinkers.
Here’s a pro tip: wait until the soil’s dry before watering.
Overwatering is a rookie mistake that can lead to root rot.
Feeding
Now, onto feeding.
These plants aren’t greedy, but they do appreciate a snack.
Use a balanced, water-soluble fertiliser every month during growing season.
But ease off in winter – that’s their rest time.
Temperature
Temperature’s another biggie.
Kalanchoes like it warm, but not hot.
Aim for 15-21°C (60-70°F).
Anything below 10°C (50°F) and they’ll start sulking.
Pruning
Here’s a game-changer: pruning.
Don’t be shy about snipping off spent blooms and leggy growth.
It encourages bushier growth and more flowers.
Triggering Blooms
Speaking of flowers, want to know a secret?
To trigger blooming, give your Kalanchoe 14 hours of complete darkness each night for about six weeks.
It’s a bit of faff, but the payoff is worth it.
Pest Control
Lastly, keep an eye out for pests.
Mealybugs and spider mites can be a pain.
Regular checks and a quick wipe with soapy water can nip problems in the bud.
Remember, growing Kalanchoes is about consistency and observation.
Get these basics right, and you’ll have a happy, blooming plant in no time.
FAQs on Florist Kalanchoe Propagation
Q: What’s the best time of year to propagate Kalanchoe?
A: Spring and early summer are ideal for propagating Kalanchoe. The plant is in active growth during this time, which increases the chances of successful rooting. However, you can propagate year-round if you’re growing indoors with consistent conditions.
Q: Can I propagate Kalanchoe from a single leaf?
A: Yes, you can propagate Kalanchoe from a single leaf. Choose a healthy, mature leaf and allow the cut end to callous over before planting. Keep in mind that leaf propagation may take longer than stem cuttings.
Q: How long does it take for Kalanchoe cuttings to root?
A: On average, Kalanchoe cuttings take about 2-3 weeks to develop roots. However, this can vary depending on environmental conditions and the health of the cutting. Be patient and keep the soil slightly moist during this time.
Q: Do I need to use rooting hormone for Kalanchoe propagation?
A: While not absolutely necessary, using rooting hormone can increase your success rate and speed up the rooting process. It’s especially helpful if you’re new to propagation or working with a challenging variety.
Q: How often should I water my Kalanchoe cuttings?
A: Water sparingly. Keep the soil slightly moist but not wet. Overwatering is a common mistake that can lead to rotting. It’s better to underwater than overwater. Always check the soil moisture before adding more water.
Q: Can I propagate Kalanchoe in water?
A: While it’s possible to root Kalanchoe cuttings in water, it’s not the recommended method. Soil propagation typically yields better results and reduces the risk of shock when transplanting.
Q: How do I know if my Kalanchoe cutting has successfully rooted?
A: Gently tug on the cutting after a few weeks. If you feel resistance, roots have likely formed. New leaf growth is also a good indicator of successful rooting.
Q: What’s the most common reason for failed Kalanchoe propagation?
A: Overwatering is the most common culprit. Kalanchoes are succulents and prefer drier conditions. Ensure your potting mix is well-draining and allow the soil to dry between waterings.
References
-
Missouri Botanical Garden – Kalanchoe blossfeldiana Kalanchoe blossfeldiana
-
University of Wisconsin-Madison Extension – Kalanchoe Kalanchoe
-
North Carolina State University Cooperative Extension – Plant Propagation by Leaf, Cane, and Root Cuttings Plant Propagation by Leaf, Cane, and Root Cuttings