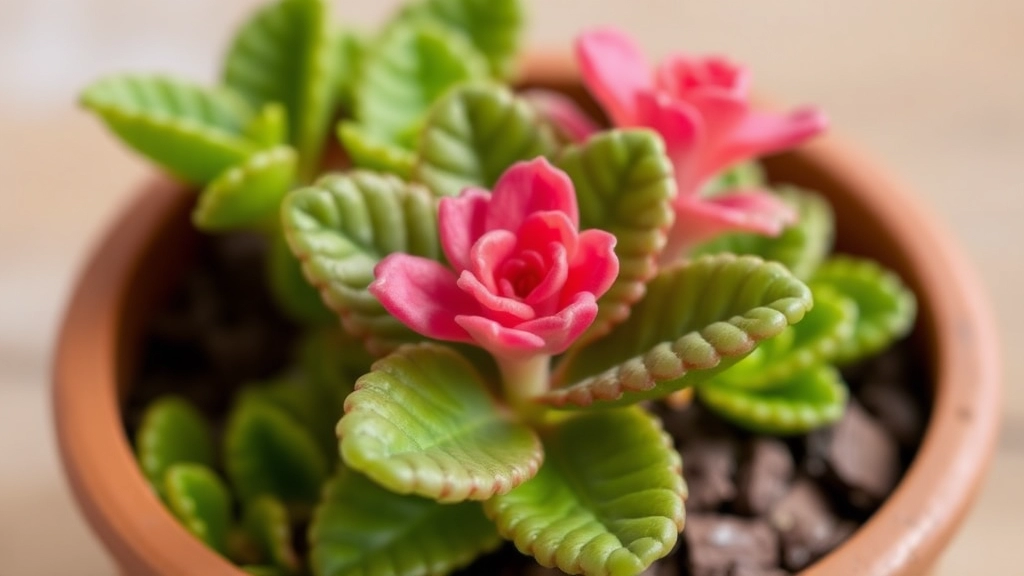
Kalanchoe Leaf Propagation
Have you ever wondered if you can propagate kalanchoe from leaves? As an avid plant enthusiast, I’m excited to share that yes, you absolutely can! In this article, I’ll guide you through the fascinating process of kalanchoe leaf propagation, from selecting the perfect leaf to nurturing your new plant baby. We’ll explore the ideal conditions, common challenges, and expert tips to ensure your propagation success.
Whether you’re a seasoned gardener or a curious beginner, propagating kalanchoe from leaves is a rewarding experience that allows you to expand your plant collection with minimal cost. Join me as we dive into the world of kalanchoe propagation, uncovering the secrets to turning a single leaf into a thriving new plant. Get ready to unleash your green thumb and watch the magic of nature unfold before your eyes!
Selecting the Right Kalanchoe Leaf for Propagation
Let’s dive into the nitty-gritty of picking the perfect Kalanchoe leaf for propagation. Trust me, this step can make or break your whole propagation game.
First things first: why are we even talking about Kalanchoe leaf propagation? Simple. It’s a killer way to multiply your plant collection without breaking the bank. Plus, it’s just plain fun.
Now, here’s the deal:
- Size matters: Go for leaves that are fully grown but not old and crusty. You want that sweet spot – mature enough to have stored nutrients but not so old they’re on their last legs.
- Health is wealth: Look for leaves that are perky, vibrant, and free from any funky spots or discoloration. If it looks iffy, skip it.
- Location, location, location: Snag leaves from the middle of the plant. Why? They’re usually in their prime – not too young, not too old.
Here’s a pro tip: If you’re eyeing a leaf and thinking, “Damn, that’s a good-looking leaf,” – that’s probably your winner.
But hold up, there’s more to consider:
- Variety matters: Some Kalanchoe types are easier to propagate than others. Mother of Thousands? Piece of cake. Flaming Katy? Bit trickier.
- Seasonal timing: Spring and summer are your best bets. The plant’s in growth mode, giving your cutting a head start.
- Clean cuts only: Use sharp, clean scissors or a knife. We’re not savages here – no ripping leaves off with your bare hands.
Remember, selecting the right Kalanchoe leaf for propagation is like picking the perfect avocado at the grocery store. It takes practice, but once you get the hang of it, you’ll be a pro in no time.
Bottom line: Choose healthy, mature leaves from the middle of a thriving Kalanchoe plant, and you’re setting yourself up for propagation success. It’s all about giving your new plant baby the best start in life.
Preparing the Leaf Cutting
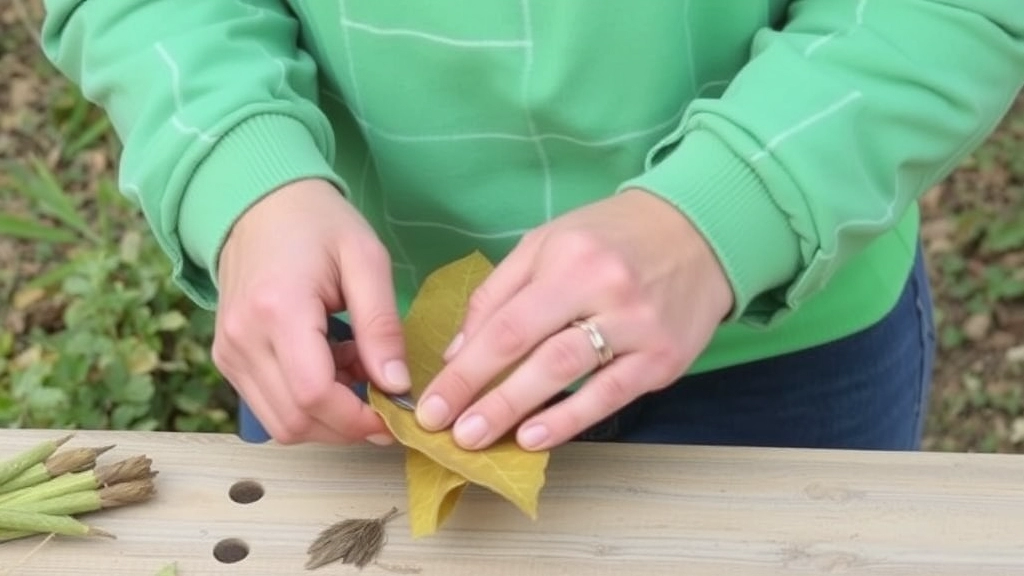
Ready to prep your Kalanchoe leaf for propagation? Let’s dive in!
First things first: cleanliness is key.
I always start by giving my hands and tools a good wash.
Trust me, it makes a world of difference in preventing nasty infections.
Now, let’s talk about choosing the perfect leaf.
You want one that’s healthy, mature, and free from any damage.
Here’s a quick checklist:
- Green and plump
- No signs of disease or pests
- Fully grown (not too young or old)
Got your leaf? Great! Let’s cut it.
I use sharp, clean scissors or a knife to make a clean cut at the base of the leaf.
Pro tip: Cut at a slight angle. It increases the surface area for root growth.
Some folks like to dip the cut end in rooting hormone.
It’s not a must, but it can give your leaf a head start.
If you’re going this route, just dip the cut end in the powder and tap off the excess.
Remember, less is more here!
Now, your Kalanchoe leaf cutting is ready for the next step.
We’re on our way to propagation success!
Drying and Callousing the Leaf Cutting
Alright, let’s talk about drying and callousing your Kalanchoe leaf cutting. This step’s crucial, folks. It’s like prepping your fighter before they step into the ring – you gotta get it right.
Why Bother with Drying?
Look, here’s the deal: if you skip this step, you’re asking for trouble. Your cutting’s gonna rot faster than a banana in the sun. Trust me, I’ve been there, and it ain’t pretty.
The Drying Process: Keep It Simple
- Find a spot: Pick somewhere dry and warm. Not hot, just warm. Think of it as a nice beach day for your leaf.
- Lay it out: Put your cutting on a paper towel. Don’t baby it – it’s tougher than you think.
- Wait it out: Give it 2-3 days. Yeah, I know, patience isn’t everyone’s strong suit, but it’s worth it.
Signs It’s Ready
- The cut end looks dry and slightly calloused
- The leaf feels a bit firmer
- No signs of mould or rot (if you see these, chuck it and start over)
Common Mistakes to Avoid
- Don’t rush it. Seriously, this isn’t a race.
- Keep it out of direct sunlight. You’re drying it, not cooking it.
- Don’t let it get wet. Water at this stage is your enemy.
Pro Tip: If you’re in a hurry (who isn’t these days?), you can speed things up a bit. Use a fan to circulate air around your cutting. Just don’t go overboard – we’re not trying to recreate a wind tunnel here.
Remember, drying and callousing your Kalanchoe leaf cutting is all about setting yourself up for success. Get this right, and you’re halfway to propagation victory. Mess it up, and well… let’s just say you’ll be back at square one.
So, take your time, do it right, and watch your Kalanchoe thrive. Trust me, when you see those little roots popping out, you’ll be glad you put in the effort.
Preparing the Ideal Soil Mix for Leaf Propagation
Alright, let’s talk soil mix for your Kalanchoe leaf propagation. It’s crucial, trust me.
Here’s the deal:
- You want a mix that drains well but still holds some moisture.
- Think light and airy, not heavy and compact.
My go-to mix? It’s simple:
- 2 parts cactus soil
- 1 part perlite
- 1 part coarse sand
Why this combo?
The cactus soil’s already designed for succulents. It’s a good base.
Perlite? It’s those little white bits. They keep things airy and help with drainage.
Coarse sand? It improves drainage even more.
Mix it all up, and you’ve got the perfect home for your Kalanchoe leaf propagation.
Pro tip:
Don’t use garden soil. It’s too heavy and might cause root rot.
Remember, Kalanchoes are succulents. They hate wet feet.
Got questions about soil pH? Don’t sweat it.
Kalanchoes aren’t fussy. A neutral to slightly acidic mix (6.0-6.5 pH) works fine.
Bottom line: Good drainage is key for successful Kalanchoe leaf propagation.
Get this soil mix right, and you’re setting yourself up for propagation success. If you’re interested in a specific variety, check out the Kalanchoe tomentosa, also known as the panda plant, for its unique fuzzy leaves.
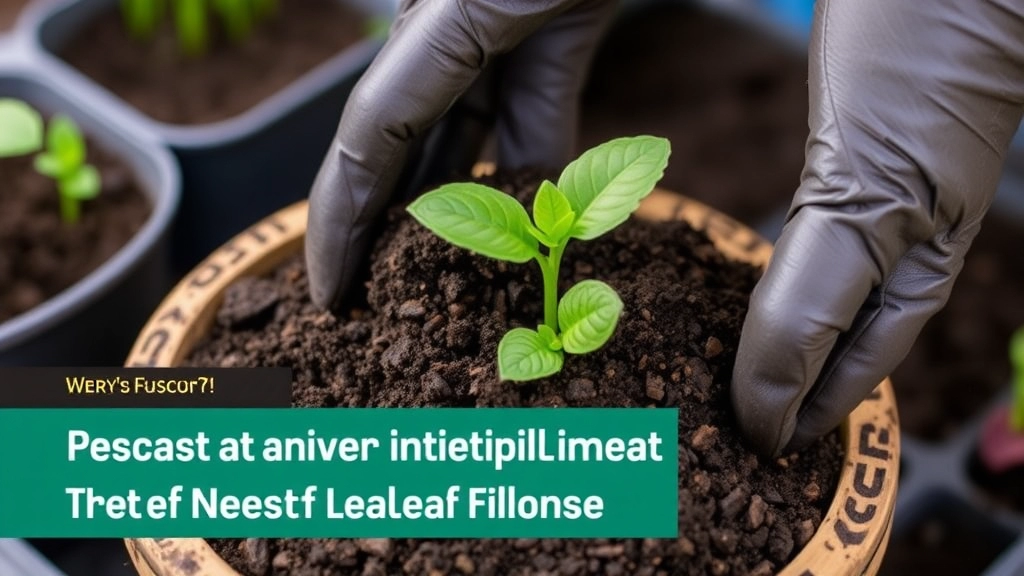
Planting the Kalanchoe Leaf Cutting
Alright, let’s get our hands dirty and plant that Kalanchoe leaf cutting! This is where the magic happens, folks. I’ve done this countless times, and I’m gonna share my no-nonsense approach to get you the best results.
First things first: Timing is everything
You’ve got your calloused leaf cutting ready to go, right? Perfect. Now, here’s a pro tip: plant it when it’s just starting to show tiny roots or a small bump at the base. That’s your green light to get planting.
The planting process: Keep it simple
- Grab your pot with drainage holes (crucial for avoiding root rot).
- Fill it with that well-draining soil mix we talked about earlier.
- Make a small hole in the soil with a pencil or your finger.
- Gently place the leaf cutting in the hole, making sure the base is in contact with the soil.
- Lightly press the soil around the leaf to keep it upright.
Easy peasy, right? But wait, there’s more!
Depth matters: Don’t bury your hopes
Here’s where a lot of folks mess up – they plant the leaf too deep. Trust me, I’ve been there. You want just the base of the leaf in the soil, not the whole thing. Think of it like this: the leaf should look like it’s sitting on the soil, not swimming in it.
Spacing: Give your babies room to grow
If you’re planting multiple leaf cuttings in one pot (and why wouldn’t you?), space them about 2-3 inches apart. This gives each little Kalanchoe the room it needs to thrive without competing with its neighbours.
The final touch: A sprinkle of love (and water)
Once your leaf cutting is snug in its new home, give it a light watering. And when I say light, I mean it. We’re talking just enough to moisten the soil, not turn it into a swamp.
Remember, Kalanchoes are succulents – they’re tough cookies that don’t need much water. Overwatering at this stage is like force-feeding a baby – it’s not gonna end well.
Troubleshooting: When things go sideways
Sometimes, despite our best efforts, things don’t go as planned. If your leaf cutting looks a bit sad after planting, don’t panic. Here are a few quick fixes:
- Leaf falling over? Use a small stick as a support.
- Soil drying out too fast? Cover the pot with a clear plastic bag to create a mini greenhouse.
- Leaf turning yellow? It might be getting too much sun. Move it to a slightly shadier spot.
The bottom line
Planting your Kalanchoe leaf cutting is a crucial step in propagation. Get this right, and you’re well on your way to a thriving new plant. Remember, it’s all about creating the right conditions and then letting nature do its thing. So plant that leaf, give it some TLC, and get ready to watch your Kalanchoe family grow!
Watering and Moisture Management
Let’s talk about keeping your Kalanchoe leaf cutting happy and hydrated. It’s a fine line between too much and too little water. Here’s the deal: moisture is key, but drowning your cutting? Big no-no. Think of it like this: you’re not watering a full-grown plant yet. Your cutting needs just enough to keep it going, not swimming. So, how do we nail this?
Misting: Your New Best Friend
Misting is your new best friend. Grab a spray bottle and give your cutting a light mist every few days. You want the soil damp, not soaked. Here’s a pro tip: stick your finger in the soil. If it feels dry an inch down, it’s misting time. But if it’s still moist, hold off. Remember, overwatering is the fastest way to kill your cutting. It’s like drowning it in kindness – sounds nice, but it’s deadly.
Humidity Matters
Now, let’s talk about humidity. Kalanchoe cuttings love a bit of moisture in the air. If your room’s dry as a bone, consider a humidity tray. It’s dead simple: grab a tray, fill it with pebbles and water. Pop your cutting pot on top of the pebbles. As the water evaporates, it creates a nice, humid microclimate. Your cutting will thank you for it. But here’s the kicker: don’t let the pot sit in water. That’s a one-way ticket to root rot city.
Watch for Warning Signs
Keep an eye out for signs of trouble. If your cutting looks wilted or the leaves are yellowing, you might be overdoing it. On the flip side, if it’s shrivelling up, it’s crying out for more water. Listen to your plant, it’ll tell you what it needs. Remember, getting the watering right is crucial for successful Kalanchoe leaf propagation.
Light and Temperature Requirements
Let’s talk about keeping your Kalanchoe leaf cuttings happy with the right light and temperature. Trust me, I’ve learned this the hard way – these little guys can be picky!
Lighting It Up
First things first, Kalanchoes love their sunshine. But here’s the kicker:
- Too much direct sun? You’ll fry ’em.
- Too little light? They’ll stretch out and get all leggy.
So, what’s the sweet spot? Bright, indirect light is your best bet. Think of it like this:
- Morning sun: Great!
- Afternoon sun: Eh, maybe a bit much.
- Shady spot with lots of ambient light: Perfect!
I’ve had success putting mine near a east-facing window. They get that gentle morning light without the harsh afternoon rays.
Temperature Talk
Now, onto temperature. Kalanchoes aren’t too fussy, but they do have their preferences:
- Ideal range: 60-75°F (15-24°C)
- Can tolerate: Down to 50°F (10°C)
- Avoid: Anything below 40°F (4°C)
Here’s a pro tip: If you’re propagating in winter, keep those cuttings away from cold drafts. I once lost a whole batch by leaving them too close to a drafty window. Lesson learned!
Seasonal Shifts
Remember, your Kalanchoe’s needs might change with the seasons:
- Summer: They might need a bit more shade.
- Winter: They’ll crave all the light they can get.
I like to rotate my plants every few days to make sure they’re getting even light exposure. It’s like giving them a little sun-tan rotation!
The Heat Factor
One last thing – heat stress is real for these guys. If you’re in a hot climate, or it’s peak summer:
- Move them away from windows during the hottest part of the day
- Use sheer curtains to filter intense light
- Consider a small fan for air circulation
Remember, Kalanchoes are succulents at heart. They’re tough, but they appreciate a bit of TLC when it comes to light and temperature. Get these factors right, and you’ll be well on your way to propagation success!
Common Challenges in Leaf Propagation and How to Overcome Them
Let’s chat about the hurdles you might face when propagating Kalanchoe leaves.
Trust me, I’ve been there, and it’s not always smooth sailing.
But don’t worry, I’ve got your back with some tried-and-true solutions.
Rotting Leaves: The Nemesis of Propagation
Ever had a leaf turn to mush? Yeah, it’s a bummer.
Usually, this happens when there’s too much moisture.
The fix? Easy. Let your leaves dry out more before planting.
And when you do water, go easy. Less is more here, folks.
Slow Growth: Patience is Key
Sometimes, it feels like watching paint dry, right?
But here’s the thing: Kalanchoes aren’t exactly speed demons.
Give them time. They’re doing their thing, even if you can’t see it.
Tip: Keep a growth diary. It’ll help you see the progress over time.
Pest Problems: Uninvited Guests
Mealybugs, aphids, spider mites â oh my!
These little buggers can wreak havoc on your baby plants.
My go-to solution? Neem oil. It’s natural and effective.
Just a quick spray every now and then keeps the pests at bay.
Leaf Discoloration: When Green Isn’t Good
Yellow or brown leaves? Don’t panic.
It could be too much sun, not enough water, or nutrient issues.
Adjust your care routine. Move them to a shadier spot or tweak your watering.
Remember, it’s all about finding that sweet spot.
No Roots: The Waiting Game
Sometimes, roots just don’t want to show up.
Patience is key here. Make sure your cutting has calloused properly.
Try dipping the end in rooting hormone. It’s like a little boost for your leaf.
And keep the soil slightly moist. Not wet, just moist.
Overcoming these challenges is part of the Kalanchoe propagation journey.
With a bit of patience and these tips, you’ll be a leaf propagation pro in no time.
Remember, every plant parent faces these issues. You’ve got this! If you’re specifically working with Kalanchoe blossfeldiana cuttings, you might encounter some unique challenges. And for those dealing with black spots on Kalanchoe leaves, don’t worry â it’s a common issue with solutions.
Timeline and Expectations for Kalanchoe Leaf Growth
Ever wondered how long it takes for a Kalanchoe leaf to grow into a full plant? Let’s break it down.
The journey from leaf to plant isn’t a sprint, it’s a marathon.
Here’s what you can expect:
Week 1-2: Drying and callousing
Your leaf cutting is just chilling, forming a protective layer.
Week 3-4: Root development
Tiny roots start to appear. It’s like magic, but slower.
Week 5-8: First shoots
Baby leaves pop up. It’s getting real now!
Month 3-4: Growth spurt
Your plant’s hitting its stride, growing new leaves like crazy.
Month 5-6: Mature plant
You’ve done it! Your Kalanchoe’s all grown up.
Remember, this timeline’s not set in stone.
Factors like light, temperature, and care can speed things up or slow ’em down.
Some tips to keep your Kalanchoe growing strong:
- Be patient. Rome wasn’t built in a day, and neither is a Kalanchoe.
- Keep the soil slightly moist, not soaked.
- Give it plenty of bright, indirect light.
- Don’t freak out if progress seems slow. It’s normal.
The key? Consistency and patience.
Stick with it, and before you know it, you’ll have a thriving Kalanchoe.
It’s all about the journey, right? Enjoy watching your little leaf become a full-fledged plant.
And remember, every Kalanchoe leaf has the potential for growth. It just needs a little time and TLC.
Frequently Asked Questions (FAQs)
Q1: Can all Kalanchoe varieties be propagated from leaves?
While most Kalanchoe varieties can be propagated from leaves, some are easier than others. Mother of Thousands, for example, is known for its easy propagation. However, varieties like Flaming Katy might be a bit more challenging. It’s always worth giving it a try!
Q2: How long does it take for a Kalanchoe leaf cutting to root?
Typically, you can expect to see roots developing within 3-4 weeks. However, this can vary depending on factors like temperature, humidity, and the specific variety of Kalanchoe. Patience is key in leaf propagation!
Q3: Do I need to use rooting hormone for Kalanchoe leaf propagation?
Rooting hormone isn’t absolutely necessary for Kalanchoe leaf propagation, but it can speed up the process and increase your success rate. If you’re new to propagation or working with a trickier variety, it might be worth using.
Q4: What’s the best time of year to propagate Kalanchoe leaves?
Spring and summer are generally the best seasons for Kalanchoe leaf propagation. The plant is in its active growth phase during these months, which can lead to quicker and more successful propagation.
Q5: How often should I water my Kalanchoe leaf cutting?
Less is more when it comes to watering Kalanchoe leaf cuttings. Mist the soil lightly every few days, or when the top inch of soil feels dry. Overwatering is one of the biggest risks in leaf propagation, so err on the side of underwatering.
Q6: Can I propagate Kalanchoe leaves in water?
While it’s possible to root Kalanchoe leaves in water, it’s generally not recommended. These succulents are prone to rot, and water propagation increases this risk. Soil propagation is usually more successful for Kalanchoes.
Q7: My Kalanchoe leaf is turning yellow during propagation. What’s wrong?
Yellowing leaves can be a sign of overwatering, too much direct sunlight, or nutrient issues. Try adjusting your watering routine, moving the cutting to a spot with bright but indirect light, and ensure you’re using a well-draining soil mix.
Q8: How do I know if my Kalanchoe leaf cutting is successfully rooted?
You can gently tug on the leaf after a few weeks. If you feel resistance, it’s likely that roots have formed. You might also see new growth emerging from the base of the leaf, which is another good sign of successful rooting.