Propagating Kalanchoe Leaves
Are you ready to expand your Kalanchoe collection without spending a dime? Propagating Kalanchoe leaves is a fun, rewarding way to multiply your plants and flex your green thumb. In this guide, we’ll dive into the simple yet effective methods for turning a single leaf into a thriving new plant. From selecting the perfect leaf to nurturing your new growth, I’ll walk you through each step of the process, sharing tips and tricks I’ve learned along the way. Whether you’re a seasoned plant parent or a curious beginner, you’ll find everything you need to successfully propagate Kalanchoe leaves and grow your indoor garden.
Get ready to discover the magic of plant propagation as we explore the best techniques for soil and water propagation, optimal growing conditions, and how to troubleshoot common issues. By the end of this article, you’ll be well-equipped to start your own Kalanchoe propagation adventure. So grab your gardening gloves, and let’s dive into the wonderful world of propagating Kalanchoe leaves!
Methods of Propagating Kalanchoe Leaves
Alright, let’s dive into the world of Kalanchoe propagation. Trust me, it’s not as complicated as it sounds. In fact, it’s pretty darn simple once you get the hang of it.
So, you’ve got this beautiful Kalanchoe plant, and you’re thinking, “Hey, I want more of these beauties!” Well, you’re in luck because these succulents are super easy to multiply. Here’s the deal:
1. Leaf Cuttings
This is probably the easiest method. You just snip off a healthy leaf, let it dry for a day or two, and boom – you’re ready to plant. It’s like magic, but with plants.
2. Stem Cuttings
If you’re feeling a bit more adventurous, go for stem cuttings. Snip off a stem with a few leaves, remove the lower ones, and you’ve got yourself a mini Kalanchoe ready to grow.
3. Division
Got a big, bushy Kalanchoe? Great! You can gently separate it into smaller plants. It’s like giving your plant a haircut and getting new plants as a bonus.
4. Seeds
Now, this one’s for the patient folks. Growing from seeds takes longer, but it’s pretty cool to watch your Kalanchoe grow from tiny specks.
Here’s the thing: no matter which method you choose, you’re basically playing plant matchmaker. You’re giving these little bits of Kalanchoe a chance to grow into full-fledged plants. It’s like being a plant parent, but way easier than raising actual kids.
Remember, propagating Kalanchoe leaves isn’t rocket science. It’s more like a fun experiment. Sometimes it works like a charm, other times not so much. But that’s part of the adventure, right?
So, which method tickles your fancy? Personally, I’m a fan of leaf cuttings. It’s quick, easy, and feels a bit like plant magic. But hey, you do you. The key is to have fun with it and not stress too much. After all, we’re talking about plants here, not brain surgery.
Next up, we’ll chat about how to get your Kalanchoe ready for this propagation party. Trust me, it’s gonna be a blast!
Preparing Your Kalanchoe for Propagation
Alright, let’s get your Kalanchoe ready for some serious growth action!
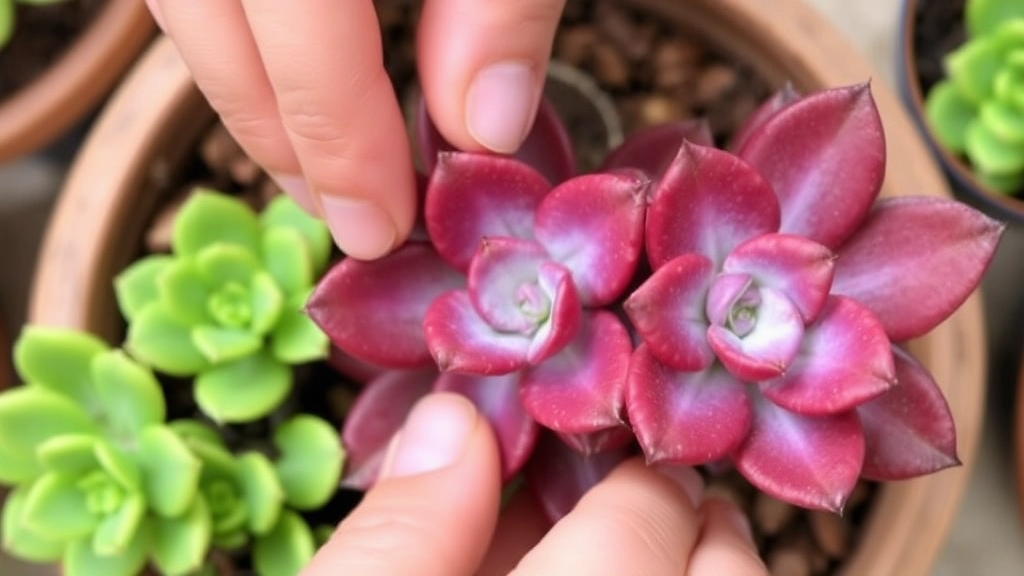
First things first, you gotta pick the right leaf.
Look for a healthy, plump leaf that’s begging to be your next plant baby.
Avoid any sad-looking or damaged leaves – they’re not gonna cut it.
Now, here’s a pro tip: give that leaf a gentle twist.
If it comes off easily, you’ve hit the jackpot.
If it’s putting up a fight, maybe it’s not ready yet.
Once you’ve got your leaf, let it chill for a day or two.
This lets the cut end dry out and form a callus.
Trust me, it’s like a little scab that’ll help prevent rot later on.
While you’re waiting, grab a clean, sharp knife or scissors.
We’re gonna need those to make a clean cut if twisting didn’t work.
Remember, cleanliness is key here. No one wants a funky infection in their new plant.
Got any rooting hormone lying around? Might be worth dusting it off.
It’s not a must, but it can give your leaf a head start in the rooting game.
Lastly, take a look at your parent plant.
If it’s looking a bit worse for wear, maybe hold off on the propagation party.
A healthy parent plant means healthier babies, you know?
So there you have it – your Kalanchoe’s all prepped and ready for propagation!
Next up, we’ll dive into the nitty-gritty of actually getting those leaves to root. If you’re dealing with a specific variety, like the Kalanchoe tomentosa, you might need to adjust your approach slightly.
Best Time of Year for Propagation
Alright, let’s chat about when to get your Kalanchoe propagation game on. Timing’s key, folks.
Spring: The MVP Season
Spring’s your golden ticket. Why? Simple:
- Longer days = more sunlight
- Warmer temps = happy plants
- Natural growth cycle kicking in
Your Kalanchoe’s waking up from winter, ready to party. It’s like they’re saying, “Let’s grow, baby!”
Summer: Still Good, But Watch Out
Summer can work too, but:
- Heat can be intense
- More watering needed
- Risk of sunburn (yeah, plants get it too)
Tip: If you’re a summer propagator, give your new plants some shade love.
Autumn & Winter: Tricky Business
Look, it’s not impossible, but:
- Less light = slower growth
- Cold can shock new plants
- Higher risk of rot (moisture hangs around)
If you’re dead set on winter propagation, invest in some grow lights. Trust me, your Kalanchoe will thank you.
My Two Cents
I’ve had the best luck with spring starts. The plants just seem happier, you know? But hey, if you’ve got the itch to propagate in off-seasons, go for it. Just be ready to give your plant babies extra TLC.
Remember: Kalanchoes are tough cookies. They can handle a bit of experimentation. So don’t stress too much about perfect timing. The best time to propagate is when you’re excited and ready to dive in.
Next up, we’ll talk tools. Because even plant parents need the right gear.
Necessary Tools and Materials
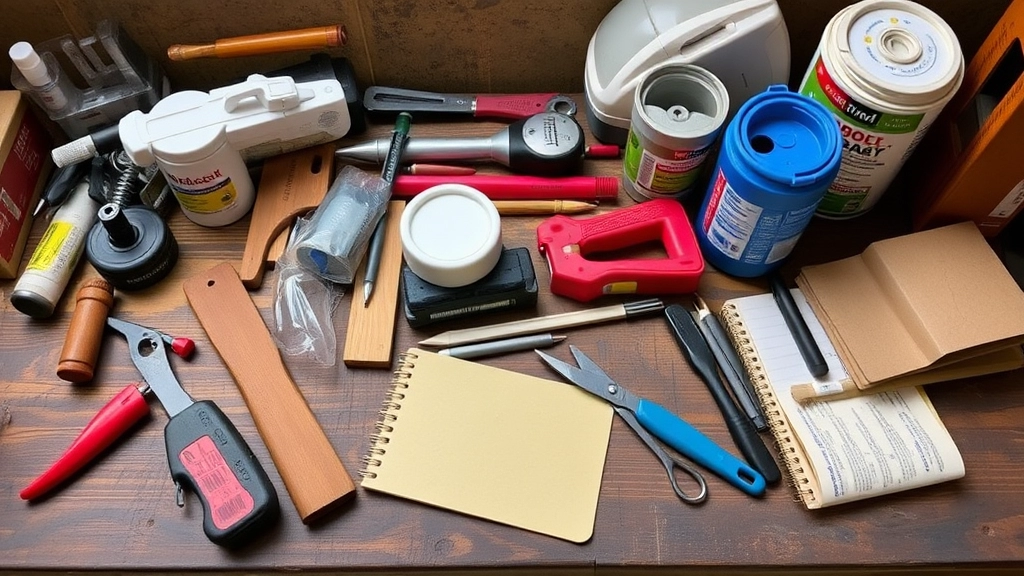
Alright, let’s get down to business. What do you need to propagate Kalanchoe leaves?
Here’s the no-nonsense list:
- Sharp, clean scissors or pruning shears
- Well-draining potting mix (cactus or succulent mix works great)
- Small pots with drainage holes
- Rooting hormone powder (optional, but can boost success)
- Spray bottle for misting
- Clear plastic bags or propagation dome (for humidity)
- Labels and a marker (trust me, you’ll want to keep track)
Now, why these specific items?
Sharp scissors? You want clean cuts, not crushed stems.
Well-draining soil? Kalanchoes hate wet feet. It’s a surefire way to rot.
Small pots? Start small, let the roots establish before going big.
Rooting hormone? It’s like a protein shake for your cuttings. Gives ’em a boost.
Spray bottle? Gentle misting keeps things moist without drowning.
Plastic bags? Creates a mini-greenhouse effect. Humidity is your friend here.
Labels? You’ll thank me later when you’re not playing “guess the plant” in a few weeks.
Remember, you don’t need fancy gear. Most of this stuff is probably lying around your house.
The key? Clean tools, good soil, and a bit of patience.
Next up: How to actually use all this stuff to get your Kalanchoe army growing.
Step-by-Step Guide to Propagating in Soil
Alright, let’s dive into the nitty-gritty of propagating Kalanchoe leaves in soil. Trust me, it’s not rocket science, but there are a few key steps to nail for the best results.
1. Snip and Prep
First things first, grab a healthy leaf from your Kalanchoe. I’m talking about one that’s plump and perky, not sad and droopy. Give it a clean cut close to the stem using sharp, clean scissors. Let it chill for a day or two to form a callus – it’s like nature’s Band-Aid.
2. Soil Mix Magic
While your leaf is doing its thing, whip up a soil mix that’ll make your Kalanchoe feel right at home. I swear by a mix of:
- 2 parts regular potting soil
- 1 part perlite or coarse sand
This combo gives the roots room to breathe and prevents waterlogging. Trust me, your Kalanchoe will thank you.
3. Pot It Up
Grab a small pot with drainage holes – no one likes wet feet, especially not Kalanchoes. Fill it with your soil mix, leaving about an inch at the top.
4. Planting Time
Here’s where the magic happens. Gently press the calloused end of your leaf into the soil, about an inch deep. No need to bury the whole leaf – it’s not playing hide and seek.
5. Water Wisely
Give your newly planted leaf a light sprinkle of water. We’re talking just enough to moisten the soil, not turn it into a swamp. Remember, these guys are succulents – they’re not big drinkers.
6. Location, Location, Location
Find a spot with bright, indirect light for your pot. Direct sun’s a no-go – it’ll fry your leaf faster than you can say “Kalanchoe.”
7. The Waiting Game
Now comes the hard part – patience. Keep the soil lightly moist (not soaking) and wait for roots and tiny leaves to sprout. It might take a few weeks, but hey, good things come to those who wait, right?
8. Baby Steps
Once you see new growth, congratulations! You’re officially a Kalanchoe parent. Gradually increase watering as the plant grows, but always let the soil dry out between waterings.
Pro Tip: If you’re propagating multiple leaves, why not make it a fun experiment? Try different soil mixes or locations and see which ones thrive best. It’s like a science project, but way cooler.
Remember, propagating Kalanchoe leaves in soil is all about creating the right conditions and then letting nature do its thing. Keep it simple, be patient, and before you know it, you’ll have a whole family of Kalanchoes to show off.
Propagating Kalanchoe Leaves in Water
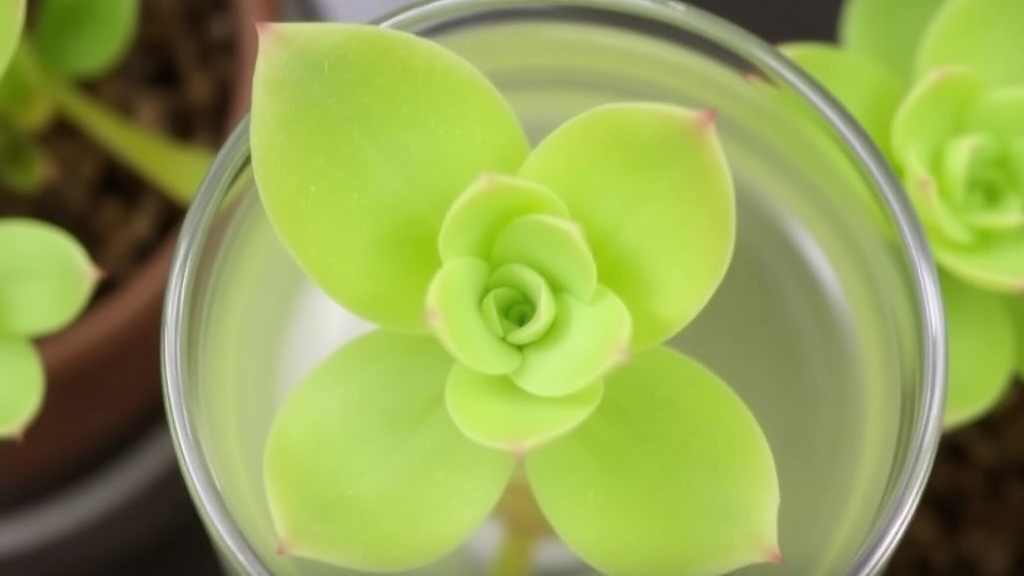
Ever wondered if you can grow Kalanchoe in water? Well, you’re in luck!
Water propagation is a fun and easy way to multiply your Kalanchoe plants.
Here’s how I do it:
- Snip a healthy leaf from your Kalanchoe plant
- Let it dry for a day or two (this helps prevent rot)
- Pop the leaf in a glass of water, making sure the stem end is submerged
- Place it in a spot with bright, indirect light
- Change the water every few days to keep it fresh
Now, here’s the cool part:
You’ll start seeing tiny roots in about 2-3 weeks. It’s like magic!
But here’s a pro tip:
Don’t leave your leaf in water for too long. Once the roots are about an inch long, it’s time to plant.
Why?
Water roots are different from soil roots. The longer they stay in water, the harder it is for them to adapt to soil.
So, what if your leaf isn’t rooting?
Don’t sweat it. Sometimes it takes a bit longer. Just be patient and keep the water clean.
Remember, not every leaf will make it. That’s just nature doing its thing.
But when it works? It’s pretty awesome to watch your Kalanchoe baby grow from just a leaf!
If you’re interested in other Kalanchoe varieties, you might want to check out the Kalanchoe beharensis ‘Fang’, which has a unique appearance and care requirements.
Optimal Soil Conditions for Kalanchoe Leaf Propagation
Alright, let’s talk dirt – literally. Getting the soil right for your Kalanchoe leaf propagation is crucial. It’s like setting the stage for a killer performance. Get it wrong, and your little leaf babies won’t stand a chance.
What’s the secret sauce?
Well, Kalanchoes are succulents, and they’re not fans of wet feet. So, we’re aiming for a mix that drains faster than your bank account on payday. Here’s what you need to know:
1. The Perfect Blend
Think sandy and gritty. A good starting point is:
- 2 parts regular potting soil
- 1 part coarse sand
- 1 part perlite or pumice
This combo gives you the drainage these suckers crave while still holding onto enough moisture to keep them happy.
2. pH Matters (But Not Too Much)
Kalanchoes aren’t too fussy, but they prefer slightly acidic to neutral soil. Aim for a pH between 5.5 and 6.5. Don’t stress if you’re a bit off – they’re pretty forgiving.
3. Organic vs. Inorganic
You can go either way, but I prefer a mix. Some organic matter helps retain nutrients, while inorganic components improve drainage. It’s all about balance, like a good cocktail.
4. Pre-made Succulent Mixes
Feeling lazy? No judgment. You can grab a pre-made succulent or cactus mix from your local garden center. Just add a bit more perlite or sand to boost drainage.
5. The No-No List
Avoid heavy, clay-like soils or anything that holds too much water. That’s a one-way ticket to root rot city, and trust me, you don’t want to visit.
Pro Tip:
Before you plant, give your soil mix a test run. Water it and see how quickly it drains. If it’s still soggy after 30 minutes, add more gritty materials.
Remember, the goal is to mimic the Kalanchoe’s natural habitat. They’re used to rocky, well-draining soils in their native Madagascar. Give them that, and they’ll reward you with healthy growth and maybe even some blooms down the line.
Next up, we’ll dive into how to keep these babies hydrated without drowning them. Stay tuned!
Proper Watering Techniques During Propagation
Watering your Kalanchoe leaves during propagation can be tricky.
Too much? You’ll drown them.
Too little? They’ll dry out.
Here’s how I nail it every time:
- Start with slightly moist soil
- Don’t water for the first few days after planting
- Once roots start forming, water lightly
How do you know when to water?
Simple: stick your finger in the soil
If it’s dry an inch down, give it a drink
But here’s the kicker: water the soil, not the leaves
Why? Wet leaves can rot
I use a spray bottle for precise watering
It’s like giving your plants a gentle mist
Remember: Kalanchoes are succulents
They store water in their leaves
So, it’s better to underwater than overwater
Pro tip: water in the morning
This gives the soil time to dry before nightfall
Soggy soil overnight? Recipe for root rot
Keep an eye on your leaves
If they’re shriveling, they need more water
If they’re mushy, ease up on the H2O
Bottom line: Kalanchoes are tough cookies
They can bounce back from underwatering
But overwatering? That’s a whole different ballgame
So, when in doubt, keep it dry
Your Kalanchoe blossfeldiana will thank you for it
If you’re interested in learning more about propagation techniques, check out our guide on how to propagate Kalanchoe from leaves.
Light and Temperature Requirements for Successful Growth
Alright, let’s talk about keeping your Kalanchoe babies happy with the right light and temp. This stuff’s crucial, folks!
Light: The Goldilocks Zone
Kalanchoes are sun-lovers, but they’re not beach bums. Here’s the deal:
- Bright, indirect light is the sweet spot
- 4-6 hours of sunlight daily keeps ’em thriving
- Morning sun? Perfect. Harsh afternoon rays? Not so much
Pro tip: If your leaves are getting pale or stretchy, they’re crying out for more light. But if they’re scorched or crispy, dial it back a notch.
Temperature: Keeping It Cozy
These succulents aren’t too fussy, but they’ve got their preferences:
- Ideal range: 60-85°F (15-29°C)
- Can handle a bit cooler at night, but not below 50°F (10°C)
- Avoid sudden temperature swings – they hate drama
Here’s the thing: Kalanchoes are tough cookies, but they’re not invincible. Too hot, and they’ll wilt faster than ice cream on a summer day. Too cold, and they’ll sulk like a teenager without Wi-Fi.
Balancing Act: Light and Heat
Here’s where it gets interesting. More light often means more heat. So, what do you do?
- In summer: Provide some shade during the hottest hours
- In winter: Move them closer to windows for maximum light
- Use grow lights if you’re in a darker spot – they’re game-changers
Remember, every Kalanchoe’s a bit different. Some might love that sunny windowsill, while others prefer a cooler, brighter corner. It’s all about watching your plant and adjusting.
Bottom line: Nail the light and temp, and you’re halfway to Kalanchoe paradise. Keep an eye on your plants, tweak as needed, and you’ll be propagating like a pro in no time!
Common Challenges and How to Overcome Them
Let’s chat about the hurdles you might face when propagating Kalanchoe leaves.
Trust me, I’ve been there, and it’s not always smooth sailing.
But don’t worry, I’ve got your back with some tried-and-true solutions.
Rotting Leaves
Ever had a leaf turn to mush? Yeah, it’s a bummer.
Usually happens when there’s too much moisture.
Quick fix: Let the leaf callus over for a day or two before planting.
And ease up on the watering, mate. These succulents like it on the drier side.
Slow Root Growth
Patience is key, but sometimes roots take forever to show up.
Try dipping the leaf in rooting hormone before planting.
It’s like giving your leaf a little growth boost.
Leaf Shriveling
Seeing your leaves shrivel up? They might be thirsty.
Mist them lightly every few days, but don’t go overboard.
Finding the sweet spot between too dry and too wet is crucial.
Pest Problems
Tiny bugs causing big issues? Been there.
Neem oil is your new best friend. It’s natural and effective.
Spray it on your leaves every week or so to keep the critters at bay.
Leggy Growth
If your new plants are stretching out, they’re probably begging for more light.
Move them to a brighter spot, but avoid direct sunlight at first.
Gradually increase their sun exposure to avoid scorching.
Remember, propagating Kalanchoe leaves is a bit of an art.
You’ll get better with practice, so don’t get discouraged if things don’t work out perfectly the first time.
Keep at it, and soon you’ll be a pro at overcoming these common challenges. If you’re dealing with kalanchoe leaves turning brown, it might be a sign of overwatering or sunburn. On the other hand, if you notice your kalanchoe leaves turning red, it could be due to stress or too much direct sunlight.
Signs of Successful Propagation and Next Steps
Alright, let’s talk about how to know if your Kalanchoe leaf propagation is actually working. Trust me, I’ve been there – staring at a leaf, wondering if it’s doing anything or just slowly dying. But don’t worry, I’ve got your back.
Here’s what to look out for:
1. Root Development
The first sign you’re on the right track is when you see tiny roots popping out. It’s like your plant’s giving you a thumbs up. These roots might be white or pinkish, and they’ll start appearing at the base of the leaf.
2. New Growth
Next up, you’ll spot tiny leaves forming. It’s pretty exciting when you see these little guys – it means your propagation is really taking off.
3. Firmness of the Leaf
If your leaf stays firm and doesn’t get mushy, that’s a good sign. A rotting leaf is bad news, but a firm one means it’s still kicking.
4. Color Changes
Keep an eye on the color. If it stays relatively consistent (maybe a bit paler), you’re good. But if it’s turning yellow or brown, something might be off.
So, what’s next when you see these signs?
- Time to Pot Up: Once you’ve got roots about an inch long, it’s time to move your baby plant to its own pot. Don’t rush this – patience is key.
- Gradual Exposure: Start introducing your new plant to more light, but do it slowly. No need to shock the little guy.
- Regular Care Routine: Begin treating it like a grown-up Kalanchoe. Water when the soil’s dry, give it plenty of light, and watch it thrive.
Remember, not every leaf will make it, and that’s okay. It’s all part of the gardening game. If some leaves don’t show these signs after a few weeks, it might be time to try again with fresh leaves.
The key is to keep at it. Before you know it, you’ll have a bunch of new Kalanchoe plants to show off or share with friends. And trust me, there’s nothing quite like the feeling of seeing a plant you’ve grown from just a leaf. It’s pretty awesome.
How to Care for Newly Propagated Kalanchoe Plants
Alright, you’ve successfully propagated your Kalanchoe. Now what?
Let’s dive into keeping these little guys thriving.
Light
First things first: light.
These succulents love bright, indirect sunlight.
Too much direct sun? They’ll get sunburnt. Too little? They’ll stretch out, looking for light.
Find that sweet spot, maybe near a window with a sheer curtain.
Watering
Water? Less is more.
These plants are drought-tolerant. Overwatering is their nemesis.
Let the soil dry out completely between waterings.
When you do water, give ’em a good soak, then let it drain.
Temperature
Temperature-wise, they’re pretty chill.
Room temperature is perfect. Avoid cold drafts or extreme heat.
Soil
Soil’s crucial too.
Use a well-draining mix. Regular potting soil won’t cut it.
Mix in some perlite or sand to improve drainage.
Fertilizer
Fertilizer? Go easy.
During growing season, a diluted, balanced fertilizer once a month is plenty.
Skip it in winter when growth slows down.
Pruning
Pruning keeps ’em looking sharp.
Snip off any dead or yellowing leaves.
Want bushier plants? Pinch off the growing tips.
Pest Control
Keep an eye out for pests.
Mealybugs and spider mites love Kalanchoes.
Spot ’em early, treat ’em quick. A bit of neem oil usually does the trick.
Patience
Remember, patience is key.
These little guys take time to establish.
Don’t stress if growth seems slow at first. They’re working on their roots.
Stick to these basics, and you’ll have thriving Kalanchoes in no time.
Happy growing!
FAQs about Propagating Kalanchoe Leaves
Q: How long does it take for Kalanchoe leaves to root?
A: Typically, Kalanchoe leaves take about 2-3 weeks to start developing roots. However, this can vary depending on environmental conditions. Be patient and keep the soil slightly moist during this period.
Q: Can I propagate Kalanchoe leaves in water?
A: Yes, you can propagate Kalanchoe leaves in water. Place the leaf in a container with water, ensuring the stem end is submerged. Change the water every few days. Once roots develop (usually in 2-3 weeks), transfer the leaf to soil.
Q: What’s the best time of year to propagate Kalanchoe leaves?
A: Spring is generally the best time to propagate Kalanchoe leaves. The plant is entering its active growth phase, which increases the chances of successful propagation. However, you can propagate year-round if you provide the right conditions.
Q: Why are my propagated Kalanchoe leaves turning yellow?
A: Yellowing leaves can be a sign of overwatering or poor drainage. Ensure your soil mix is well-draining and allow the soil to dry out between waterings. It could also indicate a lack of nutrients, so consider using a diluted fertilizer once roots have developed.
Q: Do I need to use rooting hormone when propagating Kalanchoe leaves?
A: While not absolutely necessary, using rooting hormone can increase your success rate and speed up the rooting process. It’s especially helpful if you’re new to propagation or working with a particularly stubborn variety.
Q: How do I know if my propagated Kalanchoe leaf is ready for its own pot?
A: Once your leaf has developed roots about an inch long and you see new growth (tiny leaves) forming, it’s ready to be transferred to its own pot. This usually occurs 4-6 weeks after starting the propagation process.
Q: Can all Kalanchoe varieties be propagated from leaves?
A: Most Kalanchoe varieties can be propagated from leaves, but some are easier than others. Species like Kalanchoe blossfeldiana and Kalanchoe tomentosa are particularly easy to propagate. If you’re unsure, it’s always worth trying with your specific variety.